No edit summary |
No edit summary |
||
| (33 intermediate revisions by 11 users not shown) | |||
| Line 2: | Line 2: | ||
{{Infobox Technique |
{{Infobox Technique |
||
|name=Wild Sense |
|name=Wild Sense |
||
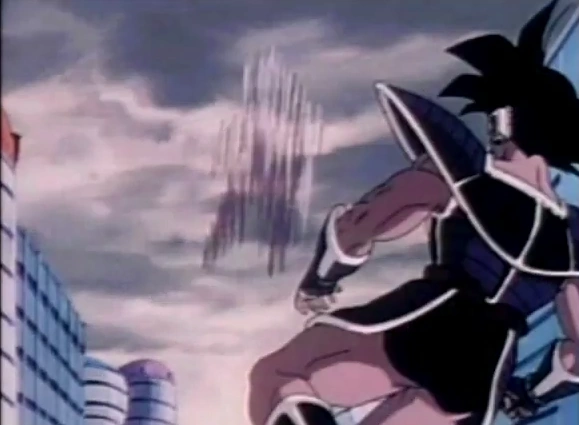
| + | |image=Dbz86-26.jpg |
||
| ⚫ | |||
| + | |image2=Dbz86-27.jpg |
||
|JapName=ワイルドセンス |
|JapName=ワイルドセンス |
||
|RomName=Wairudo Sensu |
|RomName=Wairudo Sensu |
||
| + | |alias='''Teleport Counter<br>Super Afterimage<br>Burning Counter''' |
||
| − | |alias= |
||
|debut=Manga: "[[The Fist of the Sun]]"<br>Anime: "[[Victory's Edge]]" |
|debut=Manga: "[[The Fist of the Sun]]"<br>Anime: "[[Victory's Edge]]" |
||
|inventor='''Many Fighters''' |
|inventor='''Many Fighters''' |
||
| − | |user='''[[Goku]]<ref name="BT">[[Dragon Ball Z: Budokai Tenkaichi (series)|''Budokai Tenkaichi'' |
+ | |user='''[[Goku]]<ref name="BT">[[Dragon Ball Z: Budokai Tenkaichi (series)|''Budokai Tenkaichi'' series]]</ref><br>[[Gohan]]/[[Future Gohan]]<ref name="BT"/><br>[[Goten]]<ref name="BT"/><br>[[Vegeta]]<ref name="BT"/><br>[[Gogeta]]<ref name="BT"/><br>[[Bardock]]<ref name="BT"/><br>[[Fasha]]<ref name="BT"/><br>[[Mercenary Tao]]<ref name="BT"/><br>[[Tien Shinhan]]<ref name="BT"/><br>[[Piccolo]]<ref name="BT"/><br>[[Zarbon]]<ref name="BT"/><br>[[Frieza]]<ref name="BT"/><br>[[Turles]]<br>[[Future Trunks]]<ref name="BT"/><br>[[Android 14]]<ref name="BT"/><br>[[Android 13]]<ref name="BT"/><br>[[Cell]]<ref name="BT"/><br>[[Broly]]<ref name="BT"/><br>[[Bujin]]<br>[[Zangya]]<ref name="BT"/><br>[[Pikkon]]<ref name="BT"/><br>[[Tarble]]<ref name="BT"/><br>[[Beerus]]<br>[[Uub]]<ref name="BT"/><br>[[Syn Shenron|Omega Shenron]]<ref name="BT"/>''' |
| − | |purpose=Tricking opponent |
||
| − | |type=Supportive |
||
|class=[[Movement techniques]] |
|class=[[Movement techniques]] |
||
| − | |similar='''[[Afterimage Technique]]<br>[[ |
+ | |similar='''[[Afterimage Technique]]<br>[[Beerus' Counterattack]]<br>[[Pressure Sign]]<br>[[Sonic Warp]]''' |
}} |
}} |
||
| − | '''Wild Sense''' |
+ | {{nihongo|'''Wild Sense'''|ワイルドセンス|Wairudo Sensu}} is a variation of the [[Afterimage Technique]] that allows the user to counterattack right after dodging the opponent's attack. |
==Overview== |
==Overview== |
||
| − | The user dodges an |
+ | The user dodges an attack by [[Rapid Movement|moving swiftly]] and counter-attacks the opponent with a punch or a kick sending them down to the ground or into the air. The character can also dodge [[Energy Wave|energy waves]] and [[Rush Attack|rush attacks]] like the Afterimage Technique does. The attack can also be blocked or dodged if timed right. |
| + | ==Usage== |
||
[[File:Ssj gohan fights turles.png|thumb|left|Gohan uses Wild Sense]] |
[[File:Ssj gohan fights turles.png|thumb|left|Gohan uses Wild Sense]] |
||
| − | [[Goku]] uses Wild Sense during his battle against [[Captain Ginyu]] on [[Namek]].<ref>''[[Dragon Ball Z]]'' episode 69, "[[Incredible Force!]]"</ref> Later, he uses the technique to dodge one of [[Frieza]]'s attacks<ref>''[[Dragon Ball Z]]'' episode 86, "[[The End of Vegeta]]"</ref> and, as [[Super Saiyan]], to dodge [[Frieza]]'s Death Beams during their battle on Namek.<ref>''[[Dragon Ball Z]]'' episode 96, "[[Explosion of Anger]]"</ref> Goku uses the technique once again in case Frieza does not fall for Goku's trick of pulling up at the last second and hitting himself with the [[Death Saucer]] |
+ | [[Goku]] uses Wild Sense during his battle against [[Captain Ginyu]] on [[Namek]].<ref>''[[Dragon Ball Z]]'' episode 69, "[[Incredible Force!]]"</ref> Later, he uses the technique to dodge one of [[Frieza]]'s attacks<ref>''[[Dragon Ball Z]]'' episode 86, "[[The End of Vegeta]]"</ref> and, as [[Super Saiyan]], to dodge [[Frieza]]'s Death Beams during their battle on Namek.<ref>''[[Dragon Ball Z]]'' episode 96, "[[Explosion of Anger]]"</ref> Goku uses the technique once again in case Frieza does not fall for Goku's trick of pulling up at the last second and hitting himself with the [[Death Saucer]]. |
| + | [[Piccolo]] uses the move against [[Android 17]] during their battle on the [[Tropical Islands]]; he casts out the image and after it fades through 17, the real Piccolo slams 17 away into a rock formation. |
||
| ⚫ | |||
| + | |||
| − | Wild Sense was named in the [[Dragon Ball Z: Budokai Tenkaichi (series)|''Budokai Tenkaichi'' series]] and the [[Dragon Ball: Raging Blast|''Raging Blast'' series]], where it is a [[Blast 1]] technique. |
||
| + | Goku uses the technique twice against [[Cell]] during the [[Cell Games]]; he casts the image and after it fades through Cell, the real Goku punches Cell many times in the stomach and almost rings him out but Cell recovers and continues the fight. |
||
| + | |||
| + | [[Gohan]] also uses it many times against Cell as well. |
||
| + | |||
| + | [[Vegeta]] uses Wild Sense during his battle against [[Super 17]] in ''[[Dragon Ball GT]]''. |
||
| + | |||
| ⚫ | |||
| + | In ''[[Dragon Ball Z: Broly - Second Coming]]'', [[Broly]] uses it while facing [[Goten]] and [[Trunks]] on [[Earth]], shortly after blasting them with an [[Eraser Cannon]] with enough power to force them out of their [[Super Saiyan]] forms and exhaust them, appearing in front of Goten and Trunks before using the [[Bloody Smash]] and smashing them on concrete. |
||
| + | |||
| + | In ''[[Dragon Ball Z: Battle of Gods]]'', the [[God of Destruction]] [[Beerus]] uses [[Beerus' Counterattack|his version]] to attack [[Android 18]] during his battle against the [[Dragon Team]] on Earth. |
||
| + | |||
| + | ==Video Game Appearances== |
||
| + | In the [[Dragon Ball Z: Budokai (series)|''Budokai'' series]], Teleport Counters can be used before any attack connects: a character can [[Rapid Movement|teleport]] behind the attacking character and counter-attack at the cost of 3 ''[[ki]]'' bars. The technique was named Wild Sense in the [[Dragon Ball Z: Budokai Tenkaichi (series)|''Budokai Tenkaichi'' series and ''Raging Blast'' series]], where it is a [[Blast 1]] technique. The attack is called '''Super Afterimage''' in ''[[Dragon Ball Xenoverse 2]]''. In [[J-Stars Victory Vs]], this technique is called '''Burning Counter'''. |
||
==Gallery== |
==Gallery== |
||
{{Scroll box |
{{Scroll box |
||
|content=<gallery widths="140" captionalign="center"> |
|content=<gallery widths="140" captionalign="center"> |
||
| − | Db98-16.jpg|Tien uses Wild Sense against Goku |
||
| ⚫ | |||
O1.jpg|Zarbon uses Wild Sense against Vegeta |
O1.jpg|Zarbon uses Wild Sense against Vegeta |
||
Inredible Force! 17.jpg|Goku uses Wild Sense against Ginyu |
Inredible Force! 17.jpg|Goku uses Wild Sense against Ginyu |
||
| − | Dbz86-26.jpg|Goku avoids Frieza |
||
| − | Dbz86-27.jpg|Goku kicks Frieza |
||
| − | Dbz96-56.jpg|Goku avoids Frieza's Death Beam |
||
| − | Dbz96-59.jpg|Goku avoids Frieza's Barrage Death Beam |
||
| − | Frieza Defeated!! - Afterimage.png|Goku's afterimage cut by Frieza's Death Saucer |
||
Image Projection 34.jpg|Piccolo using the technique against Android 17 |
Image Projection 34.jpg|Piccolo using the technique against Android 17 |
||
| ⚫ | |||
| − | Dbz177-17.jpg|Goku uses Wild Sense against Cell |
||
| − | Dbz177-18.jpg|Goku punches Cell |
||
| − | Dbz177-34.jpg|Goku avoids Cell's punch |
||
| − | Dbz178-27.jpg|Super Saiyan Goku uses Wild Sense |
||
Dbz179-21.jpg|Goku dodges Cell |
Dbz179-21.jpg|Goku dodges Cell |
||
| − | Dbz179-22.jpg|Goku attacks Cell's |
+ | Dbz179-22.jpg|Goku attacks Cell's Afterimage |
Dbz194-13.jpg|Future Trunks dodges Future 18's attack |
Dbz194-13.jpg|Future Trunks dodges Future 18's attack |
||
Bujin Wild Sense 1.JPG|Bujin dodges Tien's attack |
Bujin Wild Sense 1.JPG|Bujin dodges Tien's attack |
||
| Line 52: | Line 55: | ||
Dbz199-11.jpg|Pikkon dodges Goku's attack |
Dbz199-11.jpg|Pikkon dodges Goku's attack |
||
Dbz223-05.jpg|Goku dodges Yakon's attack |
Dbz223-05.jpg|Goku dodges Yakon's attack |
||
| − | DBZ - 231 - (by dbzf.ten.lt) 20120312-14550766.jpg|Goku |
+ | DBZ - 231 - (by dbzf.ten.lt) 20120312-14550766.jpg|Goku dodges Majin Buu |
DBZ - 231 - (by dbzf.ten.lt) 20120312-14550606.jpg|Goku repeats the movement against Majin Buu |
DBZ - 231 - (by dbzf.ten.lt) 20120312-14550606.jpg|Goku repeats the movement against Majin Buu |
||
BillsKnocks18(BoG).png|Beerus using Wild Sense on Android 18 |
BillsKnocks18(BoG).png|Beerus using Wild Sense on Android 18 |
||
GT Vegeta Wild Sense.JPG|Vegeta uses Wild Sense on Super 17 |
GT Vegeta Wild Sense.JPG|Vegeta uses Wild Sense on Super 17 |
||
Wild Kick.JPG|Vegeta attacks Super 17 with Wild Sense |
Wild Kick.JPG|Vegeta attacks Super 17 with Wild Sense |
||
| + | turles uswe wide sense.PNG|Turles uses Wild Sense |
||
| + | turles uswe wide sense.2.PNG |
||
| + | turles uswe wide sense.3.PNG |
||
| + | turles uswe wide sense.4.jpg |
||
| + | turles uswe wide sense.5.png |
||
| + | turles uswe wide sense. s.png |
||
| + | turles uswe wide sense.7.png |
||
| + | turles uswe wide sense.8.png |
||
| + | turles uswe wide sense.9.png |
||
| + | turles uswe wide sense.11.png |
||
| + | turles uswe wide sense.12.PNG |
||
| + | turles uswe wide sense.13.PNG |
||
| + | turles uswe wide sense.10.png |
||
| ⚫ | |||
</gallery> |
</gallery> |
||
}} |
}} |
||
| + | |||
==References== |
==References== |
||
{{Reflist}} |
{{Reflist}} |
||
[[Category:Techniques]] |
[[Category:Techniques]] |
||
| − | [[Category:Supportive |
+ | [[Category:Supportive techniques]] |
Revision as of 05:47, 21 January 2019
Directory: Techniques → Supportive Techniques → Movement techniques
Wild Sense (ワイルドセンス Wairudo Sensu) is a variation of the Afterimage Technique that allows the user to counterattack right after dodging the opponent's attack.
Overview
The user dodges an attack by moving swiftly and counter-attacks the opponent with a punch or a kick sending them down to the ground or into the air. The character can also dodge energy waves and rush attacks like the Afterimage Technique does. The attack can also be blocked or dodged if timed right.
Usage
Gohan uses Wild Sense
Goku uses Wild Sense during his battle against Captain Ginyu on Namek.[2] Later, he uses the technique to dodge one of Frieza's attacks[3] and, as Super Saiyan, to dodge Frieza's Death Beams during their battle on Namek.[4] Goku uses the technique once again in case Frieza does not fall for Goku's trick of pulling up at the last second and hitting himself with the Death Saucer.
Piccolo uses the move against Android 17 during their battle on the Tropical Islands; he casts out the image and after it fades through 17, the real Piccolo slams 17 away into a rock formation.
Goku uses the technique twice against Cell during the Cell Games; he casts the image and after it fades through Cell, the real Goku punches Cell many times in the stomach and almost rings him out but Cell recovers and continues the fight.
Gohan also uses it many times against Cell as well.
Vegeta uses Wild Sense during his battle against Super 17 in Dragon Ball GT.
Film Appearances
In Dragon Ball Z: Broly - Second Coming, Broly uses it while facing Goten and Trunks on Earth, shortly after blasting them with an Eraser Cannon with enough power to force them out of their Super Saiyan forms and exhaust them, appearing in front of Goten and Trunks before using the Bloody Smash and smashing them on concrete.
In Dragon Ball Z: Battle of Gods, the God of Destruction Beerus uses his version to attack Android 18 during his battle against the Dragon Team on Earth.
Video Game Appearances
In the Budokai series, Teleport Counters can be used before any attack connects: a character can teleport behind the attacking character and counter-attack at the cost of 3 ki bars. The technique was named Wild Sense in the Budokai Tenkaichi series and Raging Blast series, where it is a Blast 1 technique. The attack is called Super Afterimage in Dragon Ball Xenoverse 2. In J-Stars Victory Vs, this technique is called Burning Counter.
Gallery
") Zarbon uses Wild Sense against Vegeta ") Goku uses Wild Sense against Ginyu ") Piccolo using the technique against Android 17 ") Goku and Cell hit each other ") Goku dodges Cell ") Goku attacks Cell's Afterimage ") Future Trunks dodges Future 18's attack ") Bujin dodges Tien's attack ") Bujin counterattacks Tien ") Olibu misses Pikkon ") Pikkon dodges Olibu's attack again ") Pikkon moves fast ") Pikkon dodges Goku's attack ") Goku dodges Yakon's attack _20120312-14550766.jpg "DBZ - 231 - (by dbzf.ten.lt) 20120312-14550766.jpg (16 KB)") Goku dodges Majin Buu _20120312-14550606.jpg "DBZ - 231 - (by dbzf.ten.lt) 20120312-14550606.jpg (9 KB)") Goku repeats the movement against Majin Buu .png "BillsKnocks18(BoG).png (956 KB)") Beerus using Wild Sense on Android 18 ") Vegeta uses Wild Sense on Super 17 ") Vegeta attacks Super 17 with Wild Sense ") Turles uses Wild Sense ") ") ") ") ") ") ") ") ") ") ") ") ") Goku uses Wild Sense against Frieza in Raging Blast 2 |
References
- ↑ 1.00 1.01 1.02 1.03 1.04 1.05 1.06 1.07 1.08 1.09 1.10 1.11 1.12 1.13 1.14 1.15 1.16 1.17 1.18 1.19 1.20 1.21 Budokai Tenkaichi series
- ↑ Dragon Ball Z episode 69, "Incredible Force!"
- ↑ Dragon Ball Z episode 86, "The End of Vegeta"
- ↑ Dragon Ball Z episode 96, "Explosion of Anger"