No edit summary |
Tag: Rollback |
||
| (100 intermediate revisions by 34 users not shown) | |||
| Line 4: | Line 4: | ||
After the [[Frieza Saga]], the only power level stated by a [[scouter]] in the series is that of [[Future Trunks]]. In the 2000s, ''[[V-Jump]]'' revealed the official power levels of [[Cooler]] in his Final Form, [[Broly]] in his [[Legendary Super Saiyan]] form, and [[Gogeta]] in his [[Super Saiyan]] form and much later promotion for ''The Real 4-D'' revealed Frieza's in that story. |
After the [[Frieza Saga]], the only power level stated by a [[scouter]] in the series is that of [[Future Trunks]]. In the 2000s, ''[[V-Jump]]'' revealed the official power levels of [[Cooler]] in his Final Form, [[Broly]] in his [[Legendary Super Saiyan]] form, and [[Gogeta]] in his [[Super Saiyan]] form and much later promotion for ''The Real 4-D'' revealed Frieza's in that story. |
||
| − | Video games that use power levels, like ''[[Dragon Ball Z Collectible Card Game]]'', ''[[Dragon Ball Z: The Anime Adventure Game]]'', ''[[Dragon Ball Z: Attack of the Saiyans]]'', and ''[[Dragon Ball Z: Kakarot]]'', have their own scale and thus are listed separate from the main table. |
+ | Video games that use power levels, like ''[[Dragon Ball Z Collectible Card Game]]'', ''[[Dragon Ball Z: The Anime Adventure Game]]'', ''[[Dragon Ball Z: Attack of the Saiyans]]'', and ''[[Dragon Ball Z: Kakarot]]'', have their own scale and thus are listed separate from the main table. ''[[Dragon Ball Super Warriors Sticker Wafers Z]]'' also has its own scale, which is listed on its page. |
==Power Levels== |
==Power Levels== |
||
===Pre-''Dragon Ball''=== |
===Pre-''Dragon Ball''=== |
||
{|{{Powerlevel table}} |
{|{{Powerlevel table}} |
||
| + | !style="background:#f0f0f0;"|Saga |
||
| + | !style="background:#f0f0f0;"|Character |
||
| + | !style="background:#f0f0f0;"|Power level |
||
| + | !style="background:#f0f0f0;"|Source |
||
|- |
|- |
||
| + | | ''[[Dragon Ball Z: Bardock - The Father of Goku|Bardock - The Father of Goku]]'' |
||
| − | |align="center" style="background:#f0f0f0;"|'''Saga''' |
||
| + | |[[Bardock]]||10,000 (nearly)||''TV Special'' |
||
| − | |align="center" style="background:#f0f0f0;"|'''Character''' |
||
| − | |align="center" style="background:#f0f0f0;"|'''Power level''' |
||
| − | |align="center" style="background:#f0f0f0;"|'''Source''' |
||
|- |
|- |
||
| − | | |
+ | |rowspan=2|''[[Dragon Ball Z: Broly - The Legendary Super Saiyan|Broly - The Legendary Super Saiyan]]'' |
| + | |[[Broly]]||10,000 |
||
| + | |rowspan=2|''Movie #11'' |
||
|- |
|- |
||
| + | |[[Goku]]||2 |
||
| − | | ||[[Bardock]]||10,000 (nearly)||''TV Special'' |
||
|- |
|- |
||
| − | | |
+ | |rowspan=2|''[[Dragon Ball Super: Broly|Broly]]'' |
| + | |A [[List of tertiary characters#Saiyan Army Snipers|Saiyan Army Sniper]]||2,000 |
||
| + | |rowspan=2|''Movie #20'' |
||
|- |
|- |
||
| − | + | |[[Broly (DBS)]]||920 - 10,000 (fluctuates) |
|
| − | |- |
||
| − | | ||[[Goku]]||2||''Movie #11'' |
||
| − | |- |
||
| − | | ''[[Dragon Ball Super: Broly|Broly]]'' || || || |
||
| − | |- |
||
| − | | ||A [[Saiyan]] Sniper||2,000||''Movie #20'' |
||
| − | |- |
||
| − | | ||[[Broly (DBS)]]||920 - 10,000 (fluctuates)||''Movie #20'' |
||
|} |
|} |
||
===''Dragon Ball''=== |
===''Dragon Ball''=== |
||
{|{{Powerlevel table}} |
{|{{Powerlevel table}} |
||
| + | !style="background:#f0f0f0;"|Saga |
||
| + | !style="background:#f0f0f0;"|Character |
||
| + | !style="background:#f0f0f0;"|Power level |
||
| + | !style="background:#f0f0f0;"|Source |
||
|- |
|- |
||
| + | |rowspan=8|''[[Emperor Pilaf Saga]]'' |
||
| − | |align="center" style="background:#f0f0f0;"|'''Saga''' |
||
| + | |Goku||10 |
||
| − | |align="center" style="background:#f0f0f0;"|'''Character''' |
||
| + | |rowspan=2|''Daizenshuu 7'' |
||
| − | |align="center" style="background:#f0f0f0;"|'''Power level''' |
||
| − | |align="center" style="background:#f0f0f0;"|'''Source''' |
||
| − | |- |
||
| − | | ''[[Emperor Pilaf Saga]]'' || || || |
||
| − | |- |
||
| − | | ||Goku||10||''Daizenshuu 7'' |
||
| − | |- |
||
| − | | ||Goku (Great Ape)||100||''Daizenshuu 7'' |
||
| − | |- |
||
| − | | ||[[Emperor Pilaf]]||40||''Movie 6 Pamphlet'' |
||
| − | |- |
||
| − | | ||[[Shu]]||20||''Movie 6 Pamphlet'' |
||
| − | |- |
||
| − | | ||[[Mai]]||20||''Movie 6 Pamphlet'' |
||
| − | |- |
||
| − | | ||[[Oolong]]||10||''Movie 6 Pamphlet'' |
||
|- |
|- |
||
| + | |Goku (Great Ape)||100 |
||
| − | | ||[[Puar]]||10||''Movie 6 Pamphlet'' |
||
|- |
|- |
||
| + | |[[Oolong]]||10 |
||
| − | | ||[[Ox-King]]||900||''Movie 6 Pamphlet'' |
||
| + | |rowspan=17|''Movie 6 Pamphlet'' |
||
|- |
|- |
||
| + | |[[Puar]]||10 |
||
| − | | ''[[Tournament Saga]]'' || || || |
||
|- |
|- |
||
| + | |[[Ox-King]]||900 |
||
| − | | ||[[Bacterian]]||110||''Movie 6 Pamphlet'' |
||
|- |
|- |
||
| + | |[[Emperor Pilaf]]||40 |
||
| − | | ||[[Nam]]||100||''Movie 6 Pamphlet'' |
||
|- |
|- |
||
| + | |[[Shu]]||20 |
||
| − | | ||[[Ranfan]]||80||''Movie 6 Pamphlet'' |
||
|- |
|- |
||
| + | |[[Mai]]||20 |
||
| − | | ||[[Giran]]||100||''Movie 6 Pamphlet'' |
||
|- |
|- |
||
| − | | |
+ | |rowspan=4|''[[Tournament Saga]]'' |
| + | |[[Bacterian]]||110 |
||
|- |
|- |
||
| + | |[[Nam]]||100 |
||
| − | | ||[[Major Metallitron]]||150||''Movie 6 Pamphlet'' |
||
|- |
|- |
||
| + | |[[Ranfan]]||80 |
||
| − | | ||[[Colonel Silver]]||200||''Movie 6 Pamphlet'' |
||
|- |
|- |
||
| + | |[[Giran]]||100 |
||
| − | | ||[[Colonel Violet]]||150||''Movie 6 Pamphlet'' |
||
|- |
|- |
||
| + | |rowspan=8|''[[Red Ribbon Army Saga]]'' |
||
| − | | ||[[General White]]||150||''Movie 6 Pamphlet'' |
||
| + | |[[Major Metallitron]]||150 |
||
|- |
|- |
||
| + | |[[Colonel Silver]]||200 |
||
| − | | ||[[General Blue]]||180||''Movie 6 Pamphlet'' |
||
|- |
|- |
||
| − | + | |[[Colonel Violet]]||150 |
|
|- |
|- |
||
| + | |[[General White]]||150 |
||
| − | | ||[[Commander Red]]||100||''Movie 6 Pamphlet'' |
||
|- |
|- |
||
| + | |[[General Blue]]||180 |
||
| − | | ||[[Korin]]||190||''Weekly Jump #31, 1991'' |
||
|- |
|- |
||
| − | | |
+ | |[[Staff Officer Black]]||150 |
|- |
|- |
||
| + | |[[Commander Red]]||100 |
||
| − | | ||Goku||180||''Daizenshuu 7'' |
||
|- |
|- |
||
| − | + | |[[Korin]]||190||''Weekly Jump #31, 1991'' |
|
|- |
|- |
||
| + | |rowspan=4|''[[Tien Shinhan Saga]]'' |
||
| − | | ||[[Master Roshi]]||139||''Daizenshuu 7'' |
||
| + | |Goku||180 |
||
| + | |rowspan=5|''Daizenshuu 7'' |
||
|- |
|- |
||
| − | + | |[[Master Roshi]]||139 |
|
|- |
|- |
||
| − | | |
+ | |[[Tien Shinhan]]||180 |
|- |
|- |
||
| + | |[[Master Shen]]||120 |
||
| − | | ||Goku||260||''Daizenshuu 7'' |
||
|- |
|- |
||
| − | | |
+ | |rowspan=6|''[[King Piccolo Saga]]'' |
| + | |Goku||260 |
||
|- |
|- |
||
| − | + | |Master Roshi||180||''Weekly Jump #31, 1991'' |
|
|- |
|- |
||
| − | + | |[[King Piccolo]]||260||''Daizenshuu 7'' |
|
|- |
|- |
||
| + | |[[Tambourine]]||340 |
||
| − | | ||[[Drum]]||280||''Movie 6 Pamphlet'' |
||
| + | |rowspan=3|''Movie 6 Pamphlet'' |
||
|- |
|- |
||
| + | |[[Drum]]||280 |
||
| − | | ||[[Piano]]||180||''Movie 6 Pamphlet'' |
||
|- |
|- |
||
| + | |[[Piano]]||180 |
||
| − | | ''[[Piccolo Jr. Saga]]'' || || || |
||
|- |
|- |
||
| + | |rowspan=3|''[[Piccolo Jr. Saga]]'' |
||
| − | | ||Goku (Super Kamehameha)||910||''Weekly Jump #31, 1991'' |
||
| + | |Goku (Super Kamehameha)||910 |
||
| + | |rowspan=3|''Weekly Jump #31, 1991'' |
||
|- |
|- |
||
| + | |[[Chi-Chi]]||130 |
||
| − | | ||[[Cyborg Tao]]||210||''Weekly Jump #31, 1991'' |
||
|- |
|- |
||
| + | |[[Cyborg Tao]]||210 |
||
| − | | ||[[Chi-Chi]]||130||''Weekly Jump #31, 1991'' |
||
|} |
|} |
||
===''Dragon Ball Z''=== |
===''Dragon Ball Z''=== |
||
{|{{Powerlevel table}} |
{|{{Powerlevel table}} |
||
| + | !style="background:#f0f0f0;"|Saga |
||
| + | !style="background:#f0f0f0;"|Character |
||
| + | !style="background:#f0f0f0;"|Power level |
||
| + | !style="background:#f0f0f0;"|Source |
||
|- |
|- |
||
| + | |rowspan=4|''[[Dragon Ball Z: Dead Zone|Dead Zone]]'' |
||
| − | |align="center" style="background:#f0f0f0;"|'''Saga''' |
||
| + | |[[Garlic Jr.]]||1,450 |
||
| − | |align="center" style="background:#f0f0f0;"|'''Character''' |
||
| + | |rowspan=4|''Movie 6 Pamphlet'' |
||
| − | |align="center" style="background:#f0f0f0;"|'''Power level''' |
||
| − | |align="center" style="background:#f0f0f0;"|'''Source''' |
||
|- |
|- |
||
| + | |[[Ginger]]||350 |
||
| − | | ''[[Dragon Ball Z: Dead Zone|Dead Zone]]'' || || || |
||
|- |
|- |
||
| + | |[[Sansho]]||350 |
||
| − | | ||[[Garlic Jr.]]||1,450||''Movie 6 Pamphlet'' |
||
|- |
|- |
||
| − | + | |[[Nicky]]||350 |
|
|- |
|- |
||
| + | |rowspan=14|''[[Raditz Saga]]'' |
||
| − | | ||[[Sansho]]||350||''Movie 6 Pamphlet'' |
||
| + | |[[Farmer]]||5||''Vol. 17, #195'' |
||
|- |
|- |
||
| + | |Goku (w/weights)||334 |
||
| − | | ||[[Nicky]]||350||''Movie 6 Pamphlet'' |
||
| + | |rowspan=2|''Vol. 17, #199'' |
||
|- |
|- |
||
| + | |Goku||416 |
||
| − | | ''[[Raditz Saga]]'' || || || |
||
|- |
|- |
||
| − | | || |
+ | |Goku (Kamehameha)||924||''Vol. 17, #201'' |
|- |
|- |
||
| − | | |
+ | |[[Piccolo]] (w/weights)||322||''Vol. 17, #195'' |
|- |
|- |
||
| − | | |
+ | |Piccolo||408||''Vol. 17, #199'' |
|- |
|- |
||
| − | | |
+ | |Piccolo (Special Beam Cannon #1)||1,330||''Vol. 17, #201'' |
|- |
|- |
||
| − | | |
+ | |Piccolo (Special Beam Cannon #2)||1,480||Episode 5 |
|- |
|- |
||
| − | | |
+ | |[[Gohan]]||710||''Vol. 17, #199'' |
|- |
|- |
||
| + | |Gohan (Enraged)||1,307 |
||
| − | | ||Piccolo (Special Beam Cannon #1)||1,330||''Vol. 17, #201'' |
||
| + | |rowspan=2|''Vol. 17, #203'' |
||
|- |
|- |
||
| + | |Gohan (Normal)||1 |
||
| − | | ||Piccolo (Special Beam Cannon #2)||1,480||Episode 5 |
||
|- |
|- |
||
| − | + | ||[[Raditz]]||1,200||''Vol. 18, #215'' |
|
|- |
|- |
||
| − | | |
+ | |Raditz||1,500||''Daizenshuu 7'' |
|- |
|- |
||
| − | | |
+ | |Raditz||1,600||''Movie 20 information card'' |
|- |
|- |
||
| + | |rowspan=30|''[[Vegeta Saga]]'' |
||
| − | | ||[[Raditz]]||1,500||''Daizenshuu 7'' |
||
| + | |Piccolo||329 |
||
| + | |rowspan=5|''Vol. 18, #209'' |
||
|- |
|- |
||
| + | |Tien Shinhan||250 |
||
| − | | ||Raditz||1,600||''Movie 20 information card'' |
||
|- |
|- |
||
| + | |[[Krillin]]||206 |
||
| − | | ||[[Scarface]]||3,000||''Movie 6 Pamphlet'' |
||
|- |
|- |
||
| + | |[[Yamcha]]||177 |
||
| − | | ||[[Shorty]]||3,000||''Movie 6 Pamphlet'' |
||
|- |
|- |
||
| + | |Master Roshi||139 |
||
| − | | ''[[Vegeta Saga]]'' || || || |
||
|- |
|- |
||
| − | + | |[[Bulma]]||12||''Movie 6 Pamphlet'' |
|
|- |
|- |
||
| − | | |
+ | |[[Turtle]]||.001||''Episode 8'' |
|- |
|- |
||
| + | |[[Kami]]||220 |
||
| − | | ||[[Turtle]]||.001||''Episode 8'' |
||
| + | |rowspan=2|''Weekly Jump #31, 1991'' |
||
|- |
|- |
||
| − | + | |[[Mr Popo]]||1,030 |
|
|- |
|- |
||
| + | |[[King Yemma]]||1,300 |
||
| − | | ||Tien Shinhan||250||''Vol. 18, #209'' |
||
| + | |rowspan=7|''Movie 6 Pamphlet'' |
||
|- |
|- |
||
| + | |[[Princess Snake]]||900 |
||
| − | | ||[[Yamcha]]||177||''Vol. 18, #209'' |
||
|- |
|- |
||
| + | |[[King Kai]]||3,500 |
||
| − | | ||Piccolo||329||''Vol. 18, #209'' |
||
|- |
|- |
||
| + | |[[Gregory]]||1,100 |
||
| − | | ||[[Kami]]||220||''Weekly Jump #31, 1991'' |
||
|- |
|- |
||
| + | |[[Bubbles]]||1,000 |
||
| − | | ||[[Mr Popo]]||1,030||''Weekly Jump #31, 1991'' |
||
|- |
|- |
||
| + | |[[Scarface]]||3,000 |
||
| − | | ||[[King Kai]]||3,500||''Movie 6 Pamphlet'' |
||
|- |
|- |
||
| + | |[[Shorty]]||3,000 |
||
| − | | ||[[Gregory]]||1,100||''Movie 6 Pamphlet'' |
||
|- |
|- |
||
| − | | || |
+ | |Goku (Suppressed)||5,000||''Vol. 19, #222'' |
|- |
|- |
||
| + | |Goku||Over 8,000<br>(Over 9,000 in Ocean Dub)||''Vol. 19, #224'' |
||
| − | | ||[[Princess Snake]]||900||''Movie 6 Pamphlet'' |
||
|- |
|- |
||
| − | | |
+ | |Goku (Kaio-ken x3)||17,000 to 21,000+||''Vol. 20, #230'' |
|- |
|- |
||
| + | |Piccolo||3,500 |
||
| − | | ''[[Vegeta Saga]]'' || || || |
||
| + | |rowspan=4|''Daizenshuu 7'' |
||
|- |
|- |
||
| + | |Tien Shinhan||1,830 |
||
| − | | (Saiyan Invasion)||Goku (suppressed)||5,000||''Vol. 19, #222'' |
||
|- |
|- |
||
| + | |Krillin||1,770 |
||
| − | | ||Goku||Over 8,000||''Vol. 19, #224'' |
||
|- |
|- |
||
| + | |Yamcha||1,480 |
||
| − | | ||Goku (Kaio-ken x3)||17,000 to 21,000+||''Vol. 20, #230'' |
||
|- |
|- |
||
| − | | |
+ | |Gohan||981||''Vol. 18, #214'' |
|- |
|- |
||
| − | | || |
+ | |Gohan (Masenko)||2,800||''Vol. 19, #223'' |
|- |
|- |
||
| + | |[[Yajirobe]]||970 |
||
| − | | ||Tien Shinhan||1,830||''Daizenshuu 7'' |
||
| + | |rowspan=2|''Daizenshuu 7'' |
||
|- |
|- |
||
| + | |[[Chiaotzu]]||610 |
||
| − | | ||Yamcha||1,480||''Daizenshuu 7'' |
||
|- |
|- |
||
| − | | |
+ | |[[Vegeta]]||18,000||''Vol. 21, #249'' |
|- |
|- |
||
| + | |[[Nappa]]||4,000||''Daizenshuu 7'' |
||
| − | | ||Gohan (Masenko)||2,800||''Vol. 19, #223'' |
||
|- |
|- |
||
| − | + | |[[Saibamen]]||1,200||''Vol. 18, #215'' |
|
|- |
|- |
||
| + | |rowspan=10|''[[Dragon Ball Z: The World's Strongest|The World's Strongest]]'' |
||
| − | | ||[[Chiaotzu]]||610||''Daizenshuu 7'' |
||
| + | |Goku||10,000 |
||
| + | |rowspan=10|''Movie 6 Pamphlet'' |
||
|- |
|- |
||
| + | |Piccolo||8,000 |
||
| − | | ||[[Saibamen]]||1,200||''Vol. 18, #215'' |
||
|- |
|- |
||
| + | |Gohan||6,000 |
||
| − | | ||[[Nappa]]||4,000||''Daizenshuu 7'' |
||
|- |
|- |
||
| − | + | |[[Krillin]]||5,000 |
|
|- |
|- |
||
| + | |[[Dr. Wheelo]]||39,000 |
||
| − | | ''[[Dragon Ball Z: The World's Strongest|The World's Strongest]]'' || || || |
||
|- |
|- |
||
| + | |[[Dr. Kochin]]||8 |
||
| − | | ||Goku||10,000||''Movie 6 Pamphlet'' |
||
|- |
|- |
||
| + | |[[Ebifurya]]||7,500 |
||
| − | | ||Piccolo||8,000||''Movie 6 Pamphlet'' |
||
|- |
|- |
||
| + | |[[Kishime]]||7,000 |
||
| − | | ||Gohan||6,000||''Movie 6 Pamphlet'' |
||
|- |
|- |
||
| + | |[[Misokatsun]]||4,300 |
||
| − | | ||[[Krillin]]||5,000||''Movie 6 Pamphlet'' |
||
|- |
|- |
||
| − | + | |[[Bio-Men]]||1,000 |
|
|- |
|- |
||
| + | |rowspan=9|''[[Dragon Ball Z: The Tree of Might|The Tree of Might]]'' |
||
| − | | ||[[Dr. Kochin]]||8||''Movie 6 Pamphlet'' |
||
| + | |Goku||30,000 |
||
| + | |rowspan=3|''Movie #6'' |
||
|- |
|- |
||
| + | |Piccolo||18,000 |
||
| − | | ||[[Kishime]]||7,000||''Movie 6 Pamphlet'' |
||
|- |
|- |
||
| + | |Gohan||10,000 |
||
| − | | ||[[Ebifurya]]||7,500||''Movie 6 Pamphlet'' |
||
|- |
|- |
||
| + | |[[Turles]]||19,000 |
||
| − | | ||[[Misokatsun]]||4,300||''Movie 6 Pamphlet'' |
||
| + | |rowspan=6|''Movie 6 Pamphlet'' |
||
|- |
|- |
||
| − | + | |[[Cacao]]||13,000 |
|
|- |
|- |
||
| + | |[[Amond]]||9,100 |
||
| − | | ''[[Dragon Ball Z: The Tree of Might|The Tree of Might]]'' || || || |
||
|- |
|- |
||
| + | |[[Daiz]]||8,400 |
||
| − | | ||Goku||30,000||''Movie #6'' |
||
|- |
|- |
||
| + | |[[Rasin]]||8,000 |
||
| − | | ||Piccolo||18,000||''Movie #6'' |
||
|- |
|- |
||
| + | |[[Lakasei]]||7,600 |
||
| − | | ||Gohan||10,000||''Movie #6'' |
||
|- |
|- |
||
| + | |rowspan=10|''[[Namek Saga]]'' |
||
| − | | ||[[Turles]]||19,000||''Movie 6 Pamphlet'' |
||
| + | |Gohan (vs. Frieza's soldiers)||1,500 |
||
| + | |rowspan=2|''Vol. 21, #248'' |
||
|- |
|- |
||
| + | |Krillin (vs. Frieza's soldiers)||1,500 |
||
| − | | ||[[Cacao]]||13,000||''Movie 6 Pamphlet'' |
||
|- |
|- |
||
| − | | |
+ | |Vegeta||19,000 to 24,000||''Vol. 21, #249'' |
|- |
|- |
||
| + | |[[Warrior-type Namekian|Namekian Warriors]] (Suppressed)||1,000 |
||
| − | | ||[[Rasin]]||8,000||''Movie 6 Pamphlet'' |
||
| + | |rowspan=2|''Vol. 22, #253'' |
||
|- |
|- |
||
| + | |Namekian Warriors||3,000 |
||
| − | | ||[[Lakasei]]||7,600||''Movie 6 Pamphlet'' |
||
|- |
|- |
||
| − | + | |[[Moori]]||5,000||''Movie 6 Pamphlet'' |
|
|- |
|- |
||
| + | |[[Banan]] and [[Sui]]||Below 1,500||''Daizenshuu 7'' |
||
| − | | ''[[Namek Saga]]'' || || || |
||
|- |
|- |
||
| − | | |
+ | |[[Cui]]||18,000||''Vol. 21, #249'' |
|- |
|- |
||
| + | |[[Dodoria]]||22,000 |
||
| − | | ||Gohan (vs. Frieza's soldiers)||1,500||''Vol. 21, #248'' |
||
| + | |rowspan=2|''Daizenshuu 7'' |
||
|- |
|- |
||
| + | |[[Zarbon]]||23,000 |
||
| − | | ||Vegeta||19,000 to 24,000||''Vol. 21, #249'' |
||
|- |
|- |
||
| + | |rowspan=17|''[[Captain Ginyu Saga]]'' |
||
| − | | ||[[Warrior-type Namekian|Namekian Warriors]] (suppressed)||1,000||''Vol. 18, #214'' |
||
| + | |Goku (Suppressed)||5,000||''Vol. 24, #279'' |
||
|- |
|- |
||
| − | | |
+ | |Goku||60,000 <br><small>(Ginyu's estimate)</small>||''Vol.24, #283'' |
|- |
|- |
||
| + | |Goku||85,000 <br><small>(Ginyu's estimate of Goku's full power)</small>||''Vol.24, #284'' |
||
| − | | ||[[Moori]]||5,000||''Movie 6 Pamphlet'' |
||
|- |
|- |
||
| − | | |
+ | |Goku||90,000||''Daizenshuu 7'' |
|- |
|- |
||
| − | | || |
+ | |Goku (Kaio-ken)||90,000 to 180,000||''Vol.24, #284'' to ''#285'' |
|- |
|- |
||
| − | | || |
+ | |Gohan (vs. Guldo)||Over 10,000||''Vol. 23, #274'' |
|- |
|- |
||
| − | | || |
+ | |Gohan (vs. Recoome)||14,000||''Daizenshuu 7'' |
|- |
|- |
||
| + | |Gohan (Masenko)||Over 20,000||''Episode 65'' |
||
| − | | ''[[Captain Ginyu Saga]]'' || || || |
||
|- |
|- |
||
| − | | |
+ | |Krillin (vs. Guldo)||Over 10,000||''Vol. 23, #274'' |
|- |
|- |
||
| − | | |
+ | |Krillin (vs. Recoome)||13,000||''Daizenshuu 7'' |
|- |
|- |
||
| − | | |
+ | |rowspan=2|Vegeta||Nearly 20,000||''Vol. 23, #275'' (original) |
|- |
|- |
||
| + | |Nearly 30,000||''Vol. 23, #275'' (''Kanzenban'') |
||
| − | | ||Gohan (vs. Recoome)||14,000||''Daizenshuu 7'' |
||
|- |
|- |
||
| − | | |
+ | |Vegeta (Post-Recoome)||250,000||''V-Jump'' |
|- |
|- |
||
| − | | |
+ | |[[Nail]]||42,000||''Vol. 24, #286'' |
|- |
|- |
||
| + | |Namekian Warriors||10,000||''Episode 70'' |
||
| − | | ||Goku||60,000 <small>(Ginyu's estimate)</small>||''Vol.24, #283'' |
||
|- |
|- |
||
| − | | || |
+ | |[[Captain Ginyu]]||120,000||''Vol. 24, #285'' |
|- |
|- |
||
| − | | |
+ | |Captain Ginyu (in Goku's body)||23,000||''Vol. 24, #288'' |
|- |
|- |
||
| + | |rowspan=8|''[[Frieza Saga]]'' |
||
| − | | ||Goku (Kaio-ken)||90,000 to 180,000||''Vol.24, #284'' to ''#285'' |
||
| + | |Goku||3,000,000 |
||
| + | |rowspan=2|''Daizenshuu 7'' |
||
|- |
|- |
||
| − | | |
+ | |Goku (Super Saiyan)||150,000,000 |
|- |
|- |
||
| + | |Gohan||200,000 <small>(and more when mad)</small> |
||
| − | | ||Krillin (vs. Recoome)||13,000||''Daizenshuu 7'' |
||
| + | |rowspan=2|''V-Jump'' |
||
|- |
|- |
||
| + | |Krillin||75,000 |
||
| − | | ||[[Nail]]||42,000||''Vol. 24, #286'' |
||
|- |
|- |
||
| − | | |
+ | |[[Frieza]] (First form)||530,000||''Vol. 24, #286'' |
|- |
|- |
||
| − | | |
+ | |Frieza (Second form)||Over 1,000,000||''Vol. 25, #296'' |
|- |
|- |
||
| − | | |
+ | |Frieza (Final form; 50%)||60,000,000 |
| + | |rowspan=2|''Daizenshuu 7'' |
||
|- |
|- |
||
| + | |Frieza (Final form; 100%)||120,000,000 |
||
| − | | ||Namekian Warriors||10,000||''Episode 70'' |
||
|- |
|- |
||
| − | | |
+ | |''[[Trunks Saga]]'' |
| + | |[[Future Trunks]] (Suppressed)||5||''Vol. 28, #331'' |
||
|- |
|- |
||
| + | |rowspan=4|''[[Dragon Ball Z: Cooler's Revenge|Cooler's Revenge]]'' |
||
| − | | ||Goku||3,000,000||''Daizenshuu 7'' |
||
| + | |[[Cooler]] (Fifth form)||470,000,000||''V-Jump'' |
||
|- |
|- |
||
| + | |[[Salza]]||170,000 |
||
| − | | ||Goku (Super Saiyan)||150,000,000||''Daizenshuu 7'' |
||
| + | |rowspan=3|''Weekly Shonen Jump'' |
||
|- |
|- |
||
| + | |[[Dore]]||185,000 |
||
| − | | ||Krillin||75,000||''V-Jump'' |
||
|- |
|- |
||
| + | |[[Neiz]]||163,000 |
||
| − | | ||Gohan||200,000 <small>(and more when mad)</small>||''V-Jump'' |
||
|- |
|- |
||
| + | |''[[Dragon Ball Z: Broly - The Legendary Super Saiyan|Broly - The Legendary Super Saiyan]]'' |
||
| − | | ||[[Frieza]] (first form)||530,000||''Vol. 24, #286'' |
||
| + | |Broly (Legendary Super Saiyan)||1,400,000,000/Maximum||''V-Jump'' |
||
|- |
|- |
||
| + | |''[[Dragon Ball Z: The Real 4-D|The Real 4-D]]'' |
||
| − | | ||Frieza (second form)||Over 1,000,000||''Vol. 25, #296'' |
||
| + | |Frieza (Final Form)||5,300,000,000||''The Real 4-D'' advertisement |
||
|- |
|- |
||
| + | |rowspan=3|''[[Babidi Saga]]'' |
||
| − | | ||Frieza (final form; 50%)||60,000,000||''Daizenshuu 7'' |
||
| + | |Goku (Super Saiyan)||3,000 kili |
||
| + | |rowspan=2|''Vol. 38, #451'' |
||
|- |
|- |
||
| + | |[[Yakon]]||800 kili |
||
| − | | ||Frieza (final form; 100%)||120,000,000||''Daizenshuu 7'' |
||
|- |
|- |
||
| + | |[[Dabura]]||Over 4,000 kili||''Episode 223'' |
||
| − | | ''[[Trunks Saga]]'' || || || |
||
|- |
|- |
||
| + | |''[[Dragon Ball Z: Fusion Reborn|Fusion Reborn]]'' |
||
| − | | ||[[Future Trunks]] (suppressed)||5||''Vol. 28, #331'' |
||
| + | |[[Gogeta|Super Gogeta]]||2,500,000,000||''V-Jump'' |
||
|- |
|- |
||
| − | | |
+ | |''[[Dragon Ball Z: Resurrection ‘F’|Resurrection ‘F’]]'' |
| + | |Frieza||1,300,000 <br><small>(Frieza's level estimated prior to training)</small>||''Movie #19'' |
||
| − | |- |
||
| − | | ||[[Cooler]] (fifth form)||470,000,000||''V-Jump'' |
||
| − | |- |
||
| − | | ||[[Salza]]||170,000||''Weekly Shonen Jump'' |
||
| − | |- |
||
| − | | ||[[Dore]]||185,000||''Weekly Shonen Jump'' |
||
| − | |- |
||
| − | | ||[[Neiz]]||163,000||''Weekly Shonen Jump'' |
||
| − | |- |
||
| − | | ''[[Dragon Ball Z: Broly - The Legendary Super Saiyan|Broly - The Legendary Super Saiyan]]'' || || || |
||
| − | |- |
||
| − | | ||Broly (Legendary Super Saiyan)||1,400,000,000||''V-Jump'' |
||
| − | |- |
||
| − | | ''[[Dragon Ball Z: The Real 4-D|The Real 4-D]]'' || || || |
||
| − | |- |
||
| − | | ||Frieza (Final Form)||5,300,000,000||''The Real 4-D'' advertisement |
||
| − | |- |
||
| − | | ''[[Babidi Saga]]'' || || || |
||
| − | |- |
||
| − | | ||[[Yakon]]||800 kili||''Vol. 38, #451'' |
||
| − | |- |
||
| − | | ||Goku (Super Saiyan)||3,000 kili||''Vol. 38, #451'' |
||
| − | |- |
||
| − | | ||[[Dabura]]||Over 4,000 kili||''Episode 223'' |
||
| − | |- |
||
| − | | ''[[Dragon Ball Z: Fusion Reborn|Fusion Reborn]]'' || || || |
||
| − | |- |
||
| − | | ||[[Gogeta|Super Gogeta]]||2,500,000,000||''V-Jump'' |
||
| − | |- |
||
| − | | ''[[Dragon Ball Z: Resurrection ‘F’|Resurrection ‘F’]]'' || || || |
||
| − | |- |
||
| − | | ||Frieza||1,300,000 <small>(Frieza's training estimated prior to training)</small>||''Movie #19'' |
||
|} |
|} |
||
===''Dragon Ball Super''=== |
===''Dragon Ball Super''=== |
||
{|{{Powerlevel table}} |
{|{{Powerlevel table}} |
||
| + | !style="background:#f0f0f0;"|Saga |
||
| + | !style="background:#f0f0f0;"|Character |
||
| + | !style="background:#f0f0f0;"|Power level |
||
| + | !style="background:#f0f0f0;"|Source |
||
| + | |- |
||
| + | |rowspan=5|''[[Dragon Ball Super: Broly|Broly]]'' |
||
| + | |[[Broly (DBS)|Broly]] (Infant)||10,000 |
||
| + | |rowspan=5|''Movie #20'' |
||
|- |
|- |
||
| + | |Broly (on [[Vampa]])||920 |
||
| − | |align="center" style="background:#f0f0f0;"|'''Saga''' |
||
| − | |align="center" style="background:#f0f0f0;"|'''Character''' |
||
| − | |align="center" style="background:#f0f0f0;"|'''Power level''' |
||
| − | |align="center" style="background:#f0f0f0;"|'''Source''' |
||
|- |
|- |
||
| + | |Broly (Adult) ||Unmeasurable |
||
| − | | ''[[Dragon Ball Super: Broly|Broly]]'' || || || |
||
|- |
|- |
||
| − | + | |[[Paragus (DBS)|Paragus]]||4,200 |
|
|- |
|- |
||
| + | |[[Beets]]||Below 920 |
||
| − | | ||[[Broly (DBS)]] ||Unmeasurable||''Movie #20'' |
||
| + | |- |
||
| + | |rowspan=2|''[[Granolah the Survivor Saga]]'' |
||
| + | |[[Monaito]] (suppressed)||5 |
||
| + | |rowspan=2|''Vol. 18, #77'' |
||
| + | |- |
||
| + | |[[Monaito]]||213 |
||
|} |
|} |
||
===Other=== |
===Other=== |
||
{|{{Powerlevel table}} |
{|{{Powerlevel table}} |
||
| + | !style="background:#f0f0f0;"|Saga |
||
| + | !style="background:#f0f0f0;"|Character |
||
| + | !style="background:#f0f0f0;"|Power level |
||
| + | !style="background:#f0f0f0;"|Source |
||
|- |
|- |
||
| + | |''[[Dragon Ball: That Time I Got Reincarnated as Yamcha|That Time I Got Reincarnated as Yamcha]]'' |
||
| − | |align="center" style="background:#f0f0f0;"|'''Saga''' |
||
| + | |[[Yamcha (Reincarnated)]]||Over 10,000||''#2'' |
||
| − | |align="center" style="background:#f0f0f0;"|'''Character''' |
||
| − | |align="center" style="background:#f0f0f0;"|'''Power level''' |
||
| − | |align="center" style="background:#f0f0f0;"|'''Source''' |
||
| − | |- |
||
| − | | ''[[Dragon Ball: That Time I Got Reincarnated as Yamcha|That Time I Got Reincarnated as Yamcha]]'' || || || |
||
| − | |- |
||
| − | | ||[[Yamcha (Reincarnated)]]||Over 10,000||''#2'' |
||
|} |
|} |
||
==Video Game Power Levels== |
==Video Game Power Levels== |
||
| + | In ''Dragon Ball Z: Kakarot'' characters' power levels change depending on the saga and increase with their level. For example, Tien's power level during the Trunks Saga will be around 70,000 and will increase somewhat when he levels up, but will be around 2,000,000 when the story reaches the Androids Saga. |
||
| + | |||
===''Dragon Ball''=== |
===''Dragon Ball''=== |
||
{|{{Powerlevel table}} |
{|{{Powerlevel table}} |
||
| + | !style="background:#f0f0f0;"|Saga |
||
| + | !style="background:#f0f0f0;"|Character |
||
| + | !style="background:#f0f0f0;"|Power level |
||
| + | !style="background:#f0f0f0;"|Source |
||
|- |
|- |
||
| + | |''[[Red Ribbon Army Saga]]'' |
||
| − | |align="center" style="background:#f0f0f0;"|'''Saga''' |
||
| + | |[[Battle Jacket]]||1,000-1,200||''[[Dragon Ball Z: Scouter Battle Taikan Kamehameha - Ora to Omee to Scouter|Scouter Battle Taikan Kamehameha]]'' |
||
| − | |align="center" style="background:#f0f0f0;"|'''Character''' |
||
| − | |align="center" style="background:#f0f0f0;"|'''Power level''' |
||
| − | |align="center" style="background:#f0f0f0;"|'''Source''' |
||
| − | |- |
||
| − | | ''[[Red Ribbon Army Saga]]'' || || || |
||
| − | |- |
||
| − | | ||[[Battle Jacket]]||1,000-1,200||''[[Dragon Ball Z: Scouter Battle Taikan Kamehameha - Ora to Omee to Scouter|Scouter Battle Taikan Kamehameha]]'' |
||
| − | {{Sources}} |
||
| − | |- |
||
| − | | ''[[Piccolo Jr. Saga]]'' || || || |
||
|- |
|- |
||
| + | |rowspan=5|''[[Piccolo Jr. Saga]]'' |
||
| − | | ||Tien Shinhan||218||''[[Dragon Ball Z: Goku Hishōden|Goku Hishōden]]'' |
||
| + | |Tien Shinhan||218 |
||
| + | |rowspan=2|''[[Dragon Ball Z: Goku Hishōden|Goku Hishōden]]'' |
||
|- |
|- |
||
| + | |rowspan=2|Piccolo||325 |
||
| − | | ||Piccolo||325||''[[Dragon Ball Z: Goku Hishōden|Goku Hishōden]]'' |
||
|- |
|- |
||
| + | |292 |
||
| − | | ||Piccolo||292||''[[Dragon Ball Z: Attack of the Saiyans|Attack of the Saiyans]]'' |
||
| + | |rowspan=3|''[[Dragon Ball Z: Attack of the Saiyans|Attack of the Saiyans]]'' |
||
|- |
|- |
||
| + | |[[Annin]]||330 |
||
| − | | ||[[Annin]]||330||''[[Dragon Ball Z: Attack of the Saiyans|Attack of the Saiyans]]'' |
||
|- |
|- |
||
| − | + | |[[Mai Machine]]||461 |
|
|} |
|} |
||
===''Dragon Ball Z''=== |
===''Dragon Ball Z''=== |
||
{|{{Powerlevel table}} |
{|{{Powerlevel table}} |
||
| + | !style="background:#f0f0f0;"|Saga |
||
| + | !style="background:#f0f0f0;"|Character |
||
| + | !style="background:#f0f0f0;"|Power level |
||
| + | !style="background:#f0f0f0;"|Source |
||
|- |
|- |
||
| + | |rowspan=16|''[[Vegeta Saga]]'' |
||
| − | |align="center" style="background:#f0f0f0;"|'''Saga''' |
||
| + | |Scarface||400 |
||
| − | |align="center" style="background:#f0f0f0;"|'''Character''' |
||
| + | |rowspan=2|''[[Dragon Ball Z: Kyōshū! Saiyan|Kyōshū! Saiyan]]'' |
||
| − | |align="center" style="background:#f0f0f0;"|'''Power level''' |
||
| − | |align="center" style="background:#f0f0f0;"|'''Source''' |
||
|- |
|- |
||
| + | |Shorty||500 |
||
| − | | ''[[Vegeta Saga]]'' || || || |
||
|- |
|- |
||
| + | |rowspan=2|Raditz||1,200||''Goku Hishōden'' |
||
| − | | ||[[Pumpkin]]||400||''[[Dragon Ball Z: Kyōshū! Saiyan|Kyōshū! Saiyan]]'' |
||
|- |
|- |
||
| + | |1,500 |
||
| − | | ||Scarface||500||''[[Dragon Ball Z: Kyōshū! Saiyan|Kyōshū! Saiyan]]'' |
||
| + | |rowspan=6|''Attack of the Saiyans'' |
||
|- |
|- |
||
| + | |[[Goz]]||541 |
||
| − | | ||Raditz||1,200||''[[Dragon Ball Z: Goku Hishōden|Goku Hishōden]]'' |
||
|- |
|- |
||
| + | |Princess Snake (Princess form)||546 |
||
| − | | ||Raditz||1,500||''[[Dragon Ball Z: Attack of the Saiyans|Attack of the Saiyans]]'' |
||
|- |
|- |
||
| + | |Princess Snake (Snake form)||891 |
||
| − | | ||[[Goz]]||541||''[[Dragon Ball Z: Attack of the Saiyans|Attack of the Saiyans]]'' |
||
|- |
|- |
||
| + | |[[Android 8]]||888 |
||
| − | | ||Princess Snake (princess form)||546||''[[Dragon Ball Z: Attack of the Saiyans|Attack of the Saiyans]]'' |
||
|- |
|- |
||
| + | |General White||800 |
||
| − | | ||Princess Snake (snake form)||891||''[[Dragon Ball Z: Attack of the Saiyans|Attack of the Saiyans]]'' |
||
|- |
|- |
||
| + | |Gohan (Great Ape)||10,000||''Kyōshū! Saiyan'' |
||
| − | | ||[[Android 8]]||888||''[[Dragon Ball Z: Attack of the Saiyans|Attack of the Saiyans]]'' |
||
|- |
|- |
||
| + | |Saibamen||3,000 |
||
| − | | ||General White||800||''[[Dragon Ball Z: Attack of the Saiyans|Attack of the Saiyans]]'' |
||
| + | |rowspan=2|''Goku Hishōden'' |
||
|- |
|- |
||
| + | |rowspan=2|Nappa||7,000 |
||
| − | | ||Gohan (Great Ape)||10,000||''[[Dragon Ball Z: Kyōshū! Saiyan|Kyōshū! Saiyan]]'' |
||
|- |
|- |
||
| + | |4,000||''Scouter Battle Taikan Kamehameha'' |
||
| − | | ||Saibamen||3,000||''[[Dragon Ball Z: Goku Hishōden|Goku Hishōden]]'' |
||
|- |
|- |
||
| − | | |
+ | |rowspan=2|Vegeta||15,000||''Goku Hishōden'' |
|- |
|- |
||
| + | |18,000||''Scouter Battle Taikan Kamehameha'' |
||
| − | | ||Vegeta||15,000||''[[Dragon Ball Z: Goku Hishōden|Goku Hishōden]]'' |
||
|- |
|- |
||
| − | + | |Vegeta (Great Ape)||70,000||''Kyōshū! Saiyan'' |
|
|- |
|- |
||
| − | | |
+ | |rowspan=11|''[[Namek Saga]]'' |
| + | |rowspan=2|[[Napple]]||5,800||''[[Dragon Ball Z II: Gekishin Freeza|Gekishin Freeza]]'' |
||
|- |
|- |
||
| − | | |
+ | |1,825||''[[Dragon Ball Z: Goku Gekitōden|Goku Gekitōden]]'' |
|- |
|- |
||
| + | |rowspan=2|[[Appule]]||6,000||''Gekishin Freeza'' |
||
| − | | ||Napple||1,825||''[[Dragon Ball Z: Goku Gekitōden|Goku Gekitōden]]'' |
||
|- |
|- |
||
| + | |1,500-1,700 |
||
| − | | ||[[Appule]]||6,000||''[[Dragon Ball Z II: Gekishin Freeza|Gekishin Freeza]]'' |
||
| + | |rowspan=3|''[[Dragon Ball Z: Super Saiya Densetsu|Super Saiya Densetsu]]'' |
||
|- |
|- |
||
| + | |[[Orlen]]||4,600-5,600 |
||
| − | | ||Appule||1,500-1,700||''[[Dragon Ball Z: Super Saiya Densetsu|Super Saiya Densetsu]]'' |
||
|- |
|- |
||
| + | |Cui||18,000 |
||
| − | | ||[[Orlen]]||4,600-5,600||''[[Dragon Ball Z: Super Saiya Densetsu|Super Saiya Densetsu]]'' |
||
|- |
|- |
||
| + | |Dodoria||22,000||''Gekishin Freeza''<br/>''Scouter Battle Taikan Kamehameha'' |
||
| − | | ||Cui||18,000||''[[Dragon Ball Z: Super Saiya Densetsu|Super Saiya Densetsu]]'' |
||
|- |
|- |
||
| − | | |
+ | |rowspan=2|Zarbon||23,000||''Gekishin Freeza'' |
|- |
|- |
||
| + | |28,000||''Scouter Battle Taikan Kamehameha'' |
||
| − | | ||Zarbon||23,000||''[[Dragon Ball Z II: Gekishin Freeza|Gekishin Freeza]]'' |
||
|- |
|- |
||
| − | | |
+ | |rowspan=2|Zarbon (Monster Form)||30,000||''Super Saiya Densetsu'' |
|- |
|- |
||
| − | + | |34,000||''Goku Gekitōden'' |
|
|- |
|- |
||
| + | |rowspan=14|''[[Ginyu Saga]]'' |
||
| − | | ||[[Guldo]]||19,000||''[[Dragon Ball Z II: Gekishin Freeza|Gekishin Freeza]]'' |
||
| + | |Vegeta||Around 50,000||''[[Dragon Ball Z: Kakarot|Kakarot]]'' |
||
|- |
|- |
||
| + | |rowspan=3|[[Guldo]]||19,000||''Gekishin Freeza'' |
||
| − | | ||Guldo||13,500||''[[Dragon Ball Z: Super Saiya Densetsu|Super Saiya Densetsu]]'' |
||
|- |
|- |
||
| + | |13,500||''Super Saiya Densetsu'' |
||
| − | | ||Guldo||11,850||''[[Dragon Ball Z: Goku Gekitōden|Goku Gekitōden]]'' |
||
|- |
|- |
||
| + | |11,850||''Goku Gekitōden'' |
||
| − | | ||[[Recoome]]||71,000||''[[Dragon Ball Z II: Gekishin Freeza|Gekishin Freeza]]'' |
||
|- |
|- |
||
| − | | |
+ | |rowspan=3|[[Recoome]]||71,000||''Gekishin Freeza'' |
|- |
|- |
||
| + | |65,000||''Super Saiya Densetsu'' |
||
| − | | ||Recoome||52,000||''[[Dragon Ball Z: Goku Gekitōden|Goku Gekitōden]]'' |
||
|- |
|- |
||
| + | |52,000||''Goku Gekitōden'' |
||
| − | | ||[[Burter]]||68,000||''[[Dragon Ball Z II: Gekishin Freeza|Gekishin Freeza]]'' |
||
|- |
|- |
||
| + | |rowspan=3|[[Burter]]||68,000||''Gekishin Freeza'' |
||
| − | | ||Burter||62,500||''[[Dragon Ball Z: Super Saiya Densetsu|Super Saiya Densetsu]]'' |
||
|- |
|- |
||
| + | |62,500||''Super Saiya Densetsu'' |
||
| − | | ||Burter||50,600||''[[Dragon Ball Z: Goku Gekitōden|Goku Gekitōden]]'' |
||
|- |
|- |
||
| + | |50,600||''Goku Gekitōden'' |
||
| − | | ||[[Jeice]]||64,000||''[[Dragon Ball Z II: Gekishin Freeza|Gekishin Freeza]]'' |
||
|- |
|- |
||
| − | | |
+ | |rowspan=3|[[Jeice]]||64,000||''Gekishin Freeza'' |
|- |
|- |
||
| + | |64,000||''Super Saiya Densetsu'' |
||
| − | | ||Jeice||50,120||''[[Dragon Ball Z: Goku Gekitōden|Goku Gekitōden]]'' |
||
|- |
|- |
||
| + | |50,120||''Goku Gekitōden'' |
||
| − | | ||Captain Ginyu||120,000||''[[Dragon Ball Z: Super Saiya Densetsu|Super Saiya Densetsu]]'' |
||
|- |
|- |
||
| − | | || |
+ | |Captain Ginyu||120,000||''Super Saiya Densetsu'' |
|- |
|- |
||
| − | | |
+ | |rowspan=5|''[[Frieza Saga]]'' |
| + | |Vegeta||Around 1,500,000||''Kakarot'' |
||
|- |
|- |
||
| − | | |
+ | |rowspan=2|Frieza (First form)||530,000||''Super Saiya Densetsu''<br>''Kakarot'' |
|- |
|- |
||
| − | + | |580,000||''Kakarot'' |
|
|- |
|- |
||
| − | + | |Frieza (Third form)||1,550,000||''Super Saiya Densetsu'' |
|
|- |
|- |
||
| − | | || |
+ | |Frieza (Final Form)||120,000,000||''Scouter Battle Taikan Kamehameha'' |
|- |
|- |
||
| − | | |
+ | |''[[Yardrat Saga]]'' |
| + | |[[Soba (Yardrat)|Soba]]||14,000,000||''[[Dragon Ball Z: Sagas|Sagas]]'' |
||
|- |
|- |
||
| + | |rowspan=5|''[[Garlic Jr. Saga]]'' |
||
| − | | ||[[Soba (Yardrat)|Soba]]||14,000,000||''[[Dragon Ball Z: Sagas]]'' |
||
| + | |[[Garlic Jr.]]||1,500,000 |
||
| + | |rowspan=5|''[[Dragon Ball Z: The Anime Adventure Game|The Anime Adventure]]'' |
||
|- |
|- |
||
| + | |[[Spice]]||1,000,000 |
||
| − | | ''[[Garlic Jr. Saga]]'' || || || |
||
|- |
|- |
||
| + | |[[Vinegar]]||800,000 |
||
| − | | ||[[Spice]]||1,000,000||[[Dragon Ball Z: The Anime Adventure Game|The Anime Adventure]] |
||
|- |
|- |
||
| + | |[[Mustard]]||450,000 |
||
| − | | ||[[Vinegar]]||800,000||[[Dragon Ball Z: The Anime Adventure Game|The Anime Adventure]] |
||
|- |
|- |
||
| + | |[[Salt]]||400,000 |
||
| − | | ||[[Mustard]]||450,000||[[Dragon Ball Z: The Anime Adventure Game|The Anime Adventure]] |
||
|- |
|- |
||
| + | |rowspan=7|''[[Trunks Saga]]'' |
||
| − | | ||[[Salt]]||400,000||[[Dragon Ball Z: The Anime Adventure Game|The Anime Adventure]] |
||
| + | |Goku||3,200,000 |
||
| + | |rowspan=13|''Kakarot'' |
||
|- |
|- |
||
| + | |Piccolo||Around 1,000,000 |
||
| − | | ||[[Garlic Jr.]]||1,500,000||[[Dragon Ball Z: The Anime Adventure Game|The Anime Adventure]] |
||
|- |
|- |
||
| + | |Tien Shinhan||Around 70,000 |
||
| − | | ''[[Trunks Saga]]'' || || || |
||
|- |
|- |
||
| − | + | |Gohan||Between 24,000 to 33,000 |
|
|- |
|- |
||
| − | | |
+ | |Yamcha||Between 12,000 to 33,000 |
|- |
|- |
||
| + | |Krillin||30,000 |
||
| − | | ||Tien Shinhan||Around 70,000 to 75,000||''[[Dragon Ball Z: Kakarot]]'' |
||
|- |
|- |
||
| − | | |
+ | |Chiaotzu||Around 6,000 |
|- |
|- |
||
| + | |rowspan=8|''[[Androids Saga]]'' |
||
| − | | ||Chiaotzu||Around 6,000 to 7,500||''[[Dragon Ball Z: Kakarot]]'' |
||
| + | |Goku||3,900,000 |
||
|- |
|- |
||
| + | |Vegeta||4,000,000 |
||
| − | | ||Piccolo||Around 1,100,000||''[[Dragon Ball Z: Kakarot]]'' |
||
|- |
|- |
||
| − | | |
+ | |Future Trunks||Around 4,000,000 |
|- |
|- |
||
| + | |Piccolo||Around 6,000,000 |
||
| − | | ''[[Androids Saga]]'' || || || |
||
|- |
|- |
||
| − | | |
+ | |Tien Shinhan||Around 2,000,000 |
|- |
|- |
||
| − | | |
+ | |Krillin||Around 160,000 |
|- |
|- |
||
| + | |[[Android 17]] |
||
| − | | ||Piccolo||Around 6,000,000||''[[Dragon Ball Z: Kakarot]]'' |
||
| + | |rowspan=2|??,???,???<br><small>(over 14,000,000)</small> |
||
| + | |rowspan=2|''Sagas'' |
||
|- |
|- |
||
| + | |[[Android 18]] |
||
| − | | ||Tien Shinhan||Around 2,000,000||''[[Dragon Ball Z: Kakarot]]'' |
||
|- |
|- |
||
| + | |rowspan=6|''[[Perfect Cell Saga]]'' |
||
| − | | ||[[Android 18]]||??,???,???<br><small>(over 14,000,000)</small>||''[[Dragon Ball Z: Sagas]]'' |
||
| + | |Goku||Around 7,500,000 |
||
| + | |rowspan=4|''Kakarot'' |
||
|- |
|- |
||
| + | |Gohan||Around 7,000,000 |
||
| − | | ||[[Android 17]]||??,???,???<br><small>(over 14,000,000)</small>||''[[Dragon Ball Z: Sagas]]'' |
||
|- |
|- |
||
| + | |Vegeta||Around 6,500,000 |
||
| − | | ||[[Semi-Perfect Cell]]||??,???,???||''[[Dragon Ball Z: Sagas]]'' |
||
|- |
|- |
||
| + | |Future Trunks||Around 6,000,000 |
||
| − | | ||[[Perfect Cell]]||???,???,???||''[[Dragon Ball Z: Sagas]]'' |
||
|- |
|- |
||
| + | |[[Cell|Semi-Perfect Cell]]||??,???,??? |
||
| − | | ''[[Dragon Ball Z: The Return of Cooler|The Return of Cooler]]'' || || || |
||
| + | |rowspan=2|''Sagas'' |
||
|- |
|- |
||
| + | |[[Cell|Perfect Cell]]||???,???,??? |
||
| − | | ||[[Meta-Cooler Corps.]]||10,000,000,000||''[[Dragon Ball Xenoverse 2]]'' |
||
|- |
|- |
||
| − | | ''[[Dragon Ball Z: |
+ | | ''[[Dragon Ball Z: The Return of Cooler|The Return of Cooler]]'' |
| + | |[[Meta-Cooler Corps.]]||10,000,000,000||''[[Dragon Ball Xenoverse 2]]'' |
||
|- |
|- |
||
| + | | ''[[Dragon Ball Z: Broly - The Legendary Super Saiyan|Broly - The Legendary Super Saiyan]]'' |
||
| − | | ||Broly (Legendary Super Saiyan)||1,400,000,000||''[[Dragon Ball Z: Scouter Battle Taikan Kamehameha - Ora to Omee to Scouter|Scouter Battle Taikan Kamehameha]]'' |
||
| + | |Broly (Legendary Super Saiyan)||1,400,000,000 |
||
| + | |rowspan=3|''Scouter Battle Taikan Kamehameha'' |
||
|- |
|- |
||
| − | | |
+ | |rowspan=2|''[[Cell Games Saga]]'' |
| + | |[[Cell]] (Perfect)||900,000,000 |
||
|- |
|- |
||
| + | |[[Cell Jr.]]||46,655,274 |
||
| − | | ||[[Cell Jr.]]||46,655,274||''[[Dragon Ball Z: Scouter Battle Taikan Kamehameha - Ora to Omee to Scouter|Scouter Battle Taikan Kamehameha]]'' |
||
|- |
|- |
||
| + | |rowspan=5|''[[Babidi Saga]]'' |
||
| − | | ||[[Cell]] (Perfect form)||900,000,000||''[[Dragon Ball Z: Scouter Battle Taikan Kamehameha - Ora to Omee to Scouter|Scouter Battle Taikan Kamehameha]]'' |
||
| + | |Goku||Around 10,000,000 |
||
| + | |rowspan=3|''Kakarot'' |
||
|- |
|- |
||
| + | |Gohan |
||
| − | | ''[[Babidi Saga]]'' || || || |
||
| + | |rowspan=2|Around 9,000,000 |
||
|- |
|- |
||
| + | |Vegeta |
||
| − | | ||[[Innocent Buu|Majin Buu]]||1,000,000,000||''[[Dragon Ball Z: Scouter Battle Taikan Kamehameha - Ora to Omee to Scouter|Scouter Battle Taikan Kamehameha]]'' |
||
| + | |- |
||
| + | |[[Innocent Buu|Majin Buu]]||1,000,000,000 |
||
| + | |rowspan=2|''Scouter Battle Taikan Kamehameha'' |
||
| + | |- |
||
| + | |[[Kid Buu]]||1,150,000,000 |
||
|- |
|- |
||
| − | | ||[[Kid Buu]]||1,150,000,000||''[[Dragon Ball Z: Scouter Battle Taikan Kamehameha - Ora to Omee to Scouter|Scouter Battle Taikan Kamehameha]]'' |
||
|} |
|} |
||
===''Dragon Ball GT''=== |
===''Dragon Ball GT''=== |
||
{|{{Powerlevel table}} |
{|{{Powerlevel table}} |
||
| + | !style="background:#f0f0f0;"|Saga |
||
| + | !style="background:#f0f0f0;"|Character |
||
| + | !style="background:#f0f0f0;"|Power level |
||
| + | !style="background:#f0f0f0;"|Source |
||
|- |
|- |
||
| + | |rowspan=3|''[[Black Star Dragon Ball Saga]]'' |
||
| − | |align="center" style="background:#f0f0f0;"|'''Saga''' |
||
| + | |[[Machine Mutant]]s||1,500-1,800 |
||
| − | |align="center" style="background:#f0f0f0;"|'''Character''' |
||
| + | |rowspan=13|''Scouter Battle Taikan Kamehameha'' |
||
| − | |align="center" style="background:#f0f0f0;"|'''Power level''' |
||
| − | |align="center" style="background:#f0f0f0;"|'''Source''' |
||
| − | |- |
||
| − | | ''[[Black Star Dragon Ball Saga]]'' || || || |
||
| − | |- |
||
| − | | ||[[Machine Mutant]]s||1,500-1,800||''[[Dragon Ball Z: Scouter Battle Taikan Kamehameha - Ora to Omee to Scouter|Scouter Battle Taikan Kamehameha]]'' |
||
| − | |- |
||
| − | | ||[[Super Mega Cannon Sigma|Super Sigma]]||10,000,000||''[[Dragon Ball Z: Scouter Battle Taikan Kamehameha - Ora to Omee to Scouter|Scouter Battle Taikan Kamehameha]]'' |
||
| − | |- |
||
| − | | ||[[General Rilldo]] (Meta-Rilldo)||1,200,000,000||''[[Dragon Ball Z: Scouter Battle Taikan Kamehameha - Ora to Omee to Scouter|Scouter Battle Taikan Kamehameha]]'' |
||
| − | |- |
||
| − | | ''[[Baby Saga]]'' || || || |
||
|- |
|- |
||
| + | |[[Super Mega Cannon Sigma|Super Sigma]]||10,000,000 |
||
| − | | ||[[Baby|Baby Vegeta]] (Super Baby 2)||1,300,000,000||''[[Dragon Ball Z: Scouter Battle Taikan Kamehameha - Ora to Omee to Scouter|Scouter Battle Taikan Kamehameha]]'' |
||
|- |
|- |
||
| + | |[[General Rilldo]] (Meta-Rilldo)||1,200,000,000 |
||
| − | | ||Goku (Super Saiyan 4)||1,500,000,000||''[[Dragon Ball Z: Scouter Battle Taikan Kamehameha - Ora to Omee to Scouter|Scouter Battle Taikan Kamehameha]]'' |
||
|- |
|- |
||
| + | |rowspan=3|''[[Baby Saga]]'' |
||
| − | | ||Baby Vegeta (Golden Great Ape)||1,580,000,000||''[[Dragon Ball Z: Scouter Battle Taikan Kamehameha - Ora to Omee to Scouter|Scouter Battle Taikan Kamehameha]]'' |
||
| + | |Goku (Super Saiyan 4)||1,500,000,000 |
||
|- |
|- |
||
| + | |[[Baby|Baby Vegeta]] (Super Baby 2)||1,300,000,000 |
||
| − | | ''[[Super 17 Saga]]'' || || || |
||
|- |
|- |
||
| + | |Baby Vegeta (Golden Great Ape)||1,580,000,000 |
||
| − | | ||Nappa||4,800||''[[Dragon Ball Z: Scouter Battle Taikan Kamehameha - Ora to Omee to Scouter|Scouter Battle Taikan Kamehameha]]'' |
||
|- |
|- |
||
| + | |rowspan=6|''[[Super 17 Saga]]'' |
||
| − | | ||Dodoria||26,399||''[[Dragon Ball Z: Scouter Battle Taikan Kamehameha - Ora to Omee to Scouter|Scouter Battle Taikan Kamehameha]]'' |
||
| + | |Nappa||4,800 |
||
|- |
|- |
||
| + | |Dodoria||26,399 |
||
| − | | ||Zarbon||27,599||''[[Dragon Ball Z: Scouter Battle Taikan Kamehameha - Ora to Omee to Scouter|Scouter Battle Taikan Kamehameha]]'' |
||
|- |
|- |
||
| + | |Zarbon||27,599 |
||
| − | | ||Frieza (Final Form)||43,994,141||''[[Dragon Ball Z: Scouter Battle Taikan Kamehameha - Ora to Omee to Scouter|Scouter Battle Taikan Kamehameha]]'' |
||
|- |
|- |
||
| + | |Frieza (Final Form)||43,994,141 |
||
| − | | ||Cell (Perfect form)||1,079,956,055||''[[Dragon Ball Z: Scouter Battle Taikan Kamehameha - Ora to Omee to Scouter|Scouter Battle Taikan Kamehameha]]'' |
||
|- |
|- |
||
| + | |Cell (Perfect form)||1,079,956,055 |
||
| − | | ||[[Super 17]]||1,500,000,000||''[[Dragon Ball Z: Scouter Battle Taikan Kamehameha - Ora to Omee to Scouter|Scouter Battle Taikan Kamehameha]]'' |
||
|- |
|- |
||
| + | |[[Super 17]]||1,500,000,000 |
||
| − | | ''[[Shadow Dragon Saga]]'' || || || |
||
|- |
|- |
||
| + | |''[[Shadow Dragon Saga]]'' |
||
| − | | ||[[Syn Shenron|Omega Shenron]]||1,900,000,000||''[[Dragon Ball Z: Scouter Battle Taikan Kamehameha - Ora to Omee to Scouter|Scouter Battle Taikan Kamehameha]]'' |
||
| + | |[[Syn Shenron|Omega Shenron]]||1,900,000,000 |
||
|} |
|} |
||
| Line 692: | Line 727: | ||
</gallery> |
</gallery> |
||
}} |
}} |
||
| − | |||
| − | ==External links== |
||
| − | *[http://www.tradecardsonline.com/?action=selectCard&goal=&game_id=18 ''Dragon Ball Z Trading Card Game'' power levels] |
||
[[es:Lista de Niveles de Poder]] |
[[es:Lista de Niveles de Poder]] |
||
Latest revision as of 20:21, 3 March 2024
- This article is about the list of Power levels. For the concept of power levels, see Power Level.

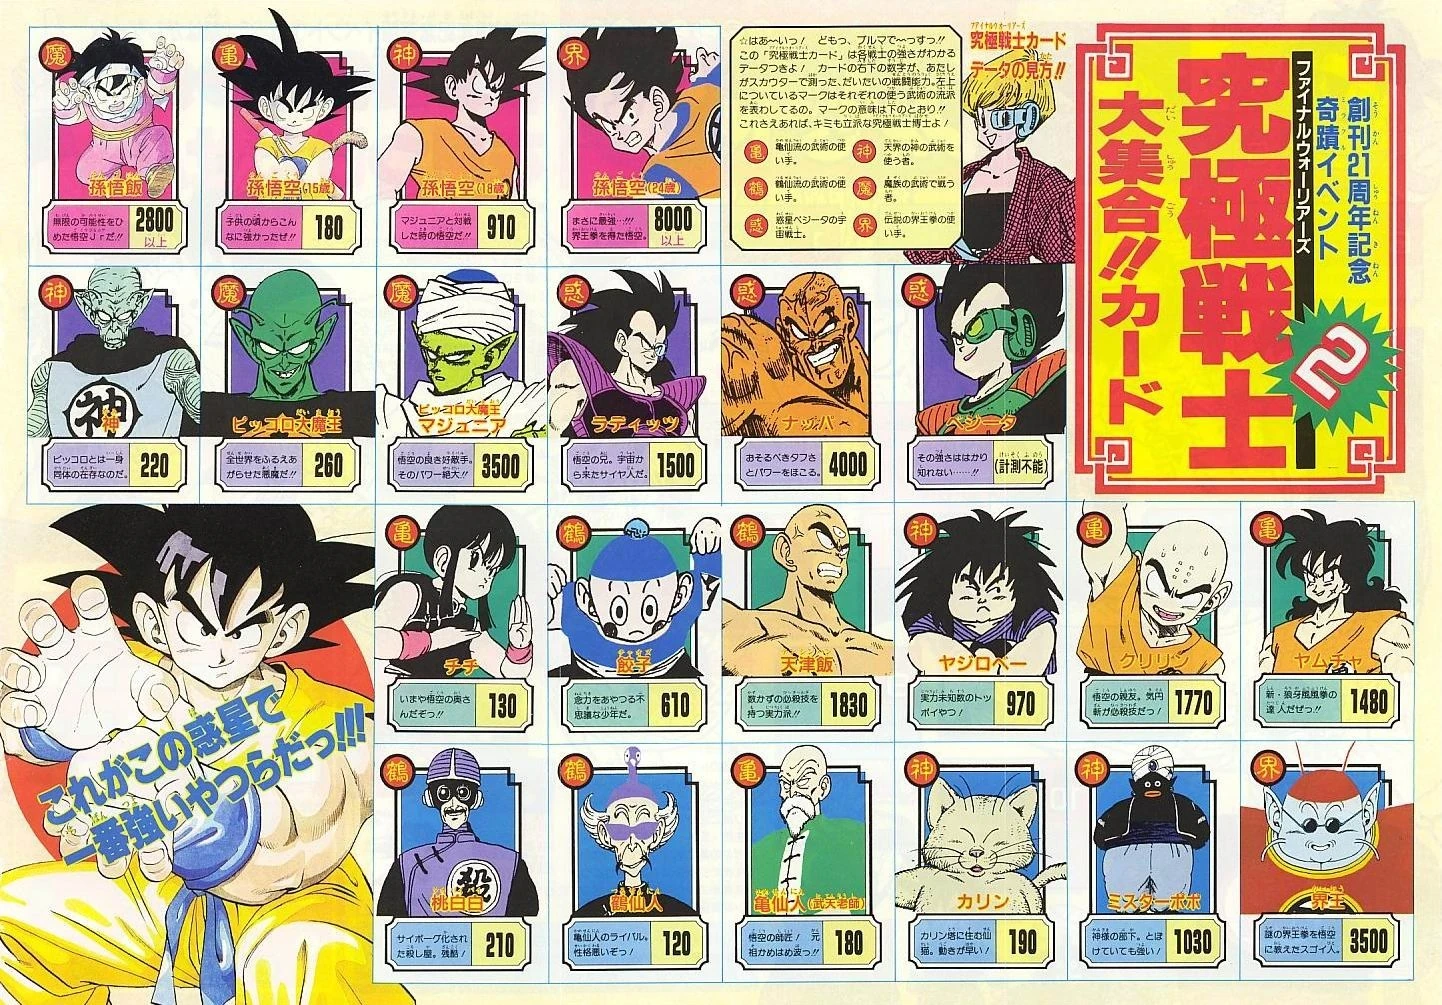
A list of power levels from Weekly Jump #31, 1989
This is a list of known and official Power Levels (戦闘力 Sentōryoku, lit. Combat Power) in the Dragon Ball universe. All of the levels on this list are taken from the manga, anime, movies, movie pamphlets, Daizenshuu guides, video games and stated mathematical calculations.
After the Frieza Saga, the only power level stated by a scouter in the series is that of Future Trunks. In the 2000s, V-Jump revealed the official power levels of Cooler in his Final Form, Broly in his Legendary Super Saiyan form, and Gogeta in his Super Saiyan form and much later promotion for The Real 4-D revealed Frieza's in that story.
Video games that use power levels, like Dragon Ball Z Collectible Card Game, Dragon Ball Z: The Anime Adventure Game, Dragon Ball Z: Attack of the Saiyans, and Dragon Ball Z: Kakarot, have their own scale and thus are listed separate from the main table. Dragon Ball Super Warriors Sticker Wafers Z also has its own scale, which is listed on its page.
Power Levels
Pre-Dragon Ball
| Saga | Character | Power level | Source |
|---|---|---|---|
| Bardock - The Father of Goku | Bardock | 10,000 (nearly) | TV Special |
| Broly - The Legendary Super Saiyan | Broly | 10,000 | Movie #11 |
| Goku | 2 | ||
| Broly | A Saiyan Army Sniper | 2,000 | Movie #20 |
| Broly (DBS) | 920 - 10,000 (fluctuates) |
Dragon Ball
| Saga | Character | Power level | Source |
|---|---|---|---|
| Emperor Pilaf Saga | Goku | 10 | Daizenshuu 7 |
| Goku (Great Ape) | 100 | ||
| Oolong | 10 | Movie 6 Pamphlet | |
| Puar | 10 | ||
| Ox-King | 900 | ||
| Emperor Pilaf | 40 | ||
| Shu | 20 | ||
| Mai | 20 | ||
| Tournament Saga | Bacterian | 110 | |
| Nam | 100 | ||
| Ranfan | 80 | ||
| Giran | 100 | ||
| Red Ribbon Army Saga | Major Metallitron | 150 | |
| Colonel Silver | 200 | ||
| Colonel Violet | 150 | ||
| General White | 150 | ||
| General Blue | 180 | ||
| Staff Officer Black | 150 | ||
| Commander Red | 100 | ||
| Korin | 190 | Weekly Jump #31, 1991 | |
| Tien Shinhan Saga | Goku | 180 | Daizenshuu 7 |
| Master Roshi | 139 | ||
| Tien Shinhan | 180 | ||
| Master Shen | 120 | ||
| King Piccolo Saga | Goku | 260 | |
| Master Roshi | 180 | Weekly Jump #31, 1991 | |
| King Piccolo | 260 | Daizenshuu 7 | |
| Tambourine | 340 | Movie 6 Pamphlet | |
| Drum | 280 | ||
| Piano | 180 | ||
| Piccolo Jr. Saga | Goku (Super Kamehameha) | 910 | Weekly Jump #31, 1991 |
| Chi-Chi | 130 | ||
| Cyborg Tao | 210 |
Dragon Ball Z
| Saga | Character | Power level | Source |
|---|---|---|---|
| Dead Zone | Garlic Jr. | 1,450 | Movie 6 Pamphlet |
| Ginger | 350 | ||
| Sansho | 350 | ||
| Nicky | 350 | ||
| Raditz Saga | Farmer | 5 | Vol. 17, #195 |
| Goku (w/weights) | 334 | Vol. 17, #199 | |
| Goku | 416 | ||
| Goku (Kamehameha) | 924 | Vol. 17, #201 | |
| Piccolo (w/weights) | 322 | Vol. 17, #195 | |
| Piccolo | 408 | Vol. 17, #199 | |
| Piccolo (Special Beam Cannon #1) | 1,330 | Vol. 17, #201 | |
| Piccolo (Special Beam Cannon #2) | 1,480 | Episode 5 | |
| Gohan | 710 | Vol. 17, #199 | |
| Gohan (Enraged) | 1,307 | Vol. 17, #203 | |
| Gohan (Normal) | 1 | ||
| Raditz | 1,200 | Vol. 18, #215 | |
| Raditz | 1,500 | Daizenshuu 7 | |
| Raditz | 1,600 | Movie 20 information card | |
| Vegeta Saga | Piccolo | 329 | Vol. 18, #209 |
| Tien Shinhan | 250 | ||
| Krillin | 206 | ||
| Yamcha | 177 | ||
| Master Roshi | 139 | ||
| Bulma | 12 | Movie 6 Pamphlet | |
| Turtle | .001 | Episode 8 | |
| Kami | 220 | Weekly Jump #31, 1991 | |
| Mr Popo | 1,030 | ||
| King Yemma | 1,300 | Movie 6 Pamphlet | |
| Princess Snake | 900 | ||
| King Kai | 3,500 | ||
| Gregory | 1,100 | ||
| Bubbles | 1,000 | ||
| Scarface | 3,000 | ||
| Shorty | 3,000 | ||
| Goku (Suppressed) | 5,000 | Vol. 19, #222 | |
| Goku | Over 8,000 (Over 9,000 in Ocean Dub) |
Vol. 19, #224 | |
| Goku (Kaio-ken x3) | 17,000 to 21,000+ | Vol. 20, #230 | |
| Piccolo | 3,500 | Daizenshuu 7 | |
| Tien Shinhan | 1,830 | ||
| Krillin | 1,770 | ||
| Yamcha | 1,480 | ||
| Gohan | 981 | Vol. 18, #214 | |
| Gohan (Masenko) | 2,800 | Vol. 19, #223 | |
| Yajirobe | 970 | Daizenshuu 7 | |
| Chiaotzu | 610 | ||
| Vegeta | 18,000 | Vol. 21, #249 | |
| Nappa | 4,000 | Daizenshuu 7 | |
| Saibamen | 1,200 | Vol. 18, #215 | |
| The World's Strongest | Goku | 10,000 | Movie 6 Pamphlet |
| Piccolo | 8,000 | ||
| Gohan | 6,000 | ||
| Krillin | 5,000 | ||
| Dr. Wheelo | 39,000 | ||
| Dr. Kochin | 8 | ||
| Ebifurya | 7,500 | ||
| Kishime | 7,000 | ||
| Misokatsun | 4,300 | ||
| Bio-Men | 1,000 | ||
| The Tree of Might | Goku | 30,000 | Movie #6 |
| Piccolo | 18,000 | ||
| Gohan | 10,000 | ||
| Turles | 19,000 | Movie 6 Pamphlet | |
| Cacao | 13,000 | ||
| Amond | 9,100 | ||
| Daiz | 8,400 | ||
| Rasin | 8,000 | ||
| Lakasei | 7,600 | ||
| Namek Saga | Gohan (vs. Frieza's soldiers) | 1,500 | Vol. 21, #248 |
| Krillin (vs. Frieza's soldiers) | 1,500 | ||
| Vegeta | 19,000 to 24,000 | Vol. 21, #249 | |
| Namekian Warriors (Suppressed) | 1,000 | Vol. 22, #253 | |
| Namekian Warriors | 3,000 | ||
| Moori | 5,000 | Movie 6 Pamphlet | |
| Banan and Sui | Below 1,500 | Daizenshuu 7 | |
| Cui | 18,000 | Vol. 21, #249 | |
| Dodoria | 22,000 | Daizenshuu 7 | |
| Zarbon | 23,000 | ||
| Captain Ginyu Saga | Goku (Suppressed) | 5,000 | Vol. 24, #279 |
| Goku | 60,000 (Ginyu's estimate) |
Vol.24, #283 | |
| Goku | 85,000 (Ginyu's estimate of Goku's full power) |
Vol.24, #284 | |
| Goku | 90,000 | Daizenshuu 7 | |
| Goku (Kaio-ken) | 90,000 to 180,000 | Vol.24, #284 to #285 | |
| Gohan (vs. Guldo) | Over 10,000 | Vol. 23, #274 | |
| Gohan (vs. Recoome) | 14,000 | Daizenshuu 7 | |
| Gohan (Masenko) | Over 20,000 | Episode 65 | |
| Krillin (vs. Guldo) | Over 10,000 | Vol. 23, #274 | |
| Krillin (vs. Recoome) | 13,000 | Daizenshuu 7 | |
| Vegeta | Nearly 20,000 | Vol. 23, #275 (original) | |
| Nearly 30,000 | Vol. 23, #275 (Kanzenban) | ||
| Vegeta (Post-Recoome) | 250,000 | V-Jump | |
| Nail | 42,000 | Vol. 24, #286 | |
| Namekian Warriors | 10,000 | Episode 70 | |
| Captain Ginyu | 120,000 | Vol. 24, #285 | |
| Captain Ginyu (in Goku's body) | 23,000 | Vol. 24, #288 | |
| Frieza Saga | Goku | 3,000,000 | Daizenshuu 7 |
| Goku (Super Saiyan) | 150,000,000 | ||
| Gohan | 200,000 (and more when mad) | V-Jump | |
| Krillin | 75,000 | ||
| Frieza (First form) | 530,000 | Vol. 24, #286 | |
| Frieza (Second form) | Over 1,000,000 | Vol. 25, #296 | |
| Frieza (Final form; 50%) | 60,000,000 | Daizenshuu 7 | |
| Frieza (Final form; 100%) | 120,000,000 | ||
| Trunks Saga | Future Trunks (Suppressed) | 5 | Vol. 28, #331 |
| Cooler's Revenge | Cooler (Fifth form) | 470,000,000 | V-Jump |
| Salza | 170,000 | Weekly Shonen Jump | |
| Dore | 185,000 | ||
| Neiz | 163,000 | ||
| Broly - The Legendary Super Saiyan | Broly (Legendary Super Saiyan) | 1,400,000,000/Maximum | V-Jump |
| The Real 4-D | Frieza (Final Form) | 5,300,000,000 | The Real 4-D advertisement |
| Babidi Saga | Goku (Super Saiyan) | 3,000 kili | Vol. 38, #451 |
| Yakon | 800 kili | ||
| Dabura | Over 4,000 kili | Episode 223 | |
| Fusion Reborn | Super Gogeta | 2,500,000,000 | V-Jump |
| Resurrection ‘F’ | Frieza | 1,300,000 (Frieza's level estimated prior to training) |
Movie #19 |
Dragon Ball Super
| Saga | Character | Power level | Source |
|---|---|---|---|
| Broly | Broly (Infant) | 10,000 | Movie #20 |
| Broly (on Vampa) | 920 | ||
| Broly (Adult) | Unmeasurable | ||
| Paragus | 4,200 | ||
| Beets | Below 920 | ||
| Granolah the Survivor Saga | Monaito (suppressed) | 5 | Vol. 18, #77 |
| Monaito | 213 |
Other
| Saga | Character | Power level | Source |
|---|---|---|---|
| That Time I Got Reincarnated as Yamcha | Yamcha (Reincarnated) | Over 10,000 | #2 |
Video Game Power Levels
In Dragon Ball Z: Kakarot characters' power levels change depending on the saga and increase with their level. For example, Tien's power level during the Trunks Saga will be around 70,000 and will increase somewhat when he levels up, but will be around 2,000,000 when the story reaches the Androids Saga.
Dragon Ball
| Saga | Character | Power level | Source |
|---|---|---|---|
| Red Ribbon Army Saga | Battle Jacket | 1,000-1,200 | Scouter Battle Taikan Kamehameha |
| Piccolo Jr. Saga | Tien Shinhan | 218 | Goku Hishōden |
| Piccolo | 325 | ||
| 292 | Attack of the Saiyans | ||
| Annin | 330 | ||
| Mai Machine | 461 |
Dragon Ball Z
| Saga | Character | Power level | Source |
|---|---|---|---|
| Vegeta Saga | Scarface | 400 | Kyōshū! Saiyan |
| Shorty | 500 | ||
| Raditz | 1,200 | Goku Hishōden | |
| 1,500 | Attack of the Saiyans | ||
| Goz | 541 | ||
| Princess Snake (Princess form) | 546 | ||
| Princess Snake (Snake form) | 891 | ||
| Android 8 | 888 | ||
| General White | 800 | ||
| Gohan (Great Ape) | 10,000 | Kyōshū! Saiyan | |
| Saibamen | 3,000 | Goku Hishōden | |
| Nappa | 7,000 | ||
| 4,000 | Scouter Battle Taikan Kamehameha | ||
| Vegeta | 15,000 | Goku Hishōden | |
| 18,000 | Scouter Battle Taikan Kamehameha | ||
| Vegeta (Great Ape) | 70,000 | Kyōshū! Saiyan | |
| Namek Saga | Napple | 5,800 | Gekishin Freeza |
| 1,825 | Goku Gekitōden | ||
| Appule | 6,000 | Gekishin Freeza | |
| 1,500-1,700 | Super Saiya Densetsu | ||
| Orlen | 4,600-5,600 | ||
| Cui | 18,000 | ||
| Dodoria | 22,000 | Gekishin Freeza Scouter Battle Taikan Kamehameha | |
| Zarbon | 23,000 | Gekishin Freeza | |
| 28,000 | Scouter Battle Taikan Kamehameha | ||
| Zarbon (Monster Form) | 30,000 | Super Saiya Densetsu | |
| 34,000 | Goku Gekitōden | ||
| Ginyu Saga | Vegeta | Around 50,000 | Kakarot |
| Guldo | 19,000 | Gekishin Freeza | |
| 13,500 | Super Saiya Densetsu | ||
| 11,850 | Goku Gekitōden | ||
| Recoome | 71,000 | Gekishin Freeza | |
| 65,000 | Super Saiya Densetsu | ||
| 52,000 | Goku Gekitōden | ||
| Burter | 68,000 | Gekishin Freeza | |
| 62,500 | Super Saiya Densetsu | ||
| 50,600 | Goku Gekitōden | ||
| Jeice | 64,000 | Gekishin Freeza | |
| 64,000 | Super Saiya Densetsu | ||
| 50,120 | Goku Gekitōden | ||
| Captain Ginyu | 120,000 | Super Saiya Densetsu | |
| Frieza Saga | Vegeta | Around 1,500,000 | Kakarot |
| Frieza (First form) | 530,000 | Super Saiya Densetsu Kakarot | |
| 580,000 | Kakarot | ||
| Frieza (Third form) | 1,550,000 | Super Saiya Densetsu | |
| Frieza (Final Form) | 120,000,000 | Scouter Battle Taikan Kamehameha | |
| Yardrat Saga | Soba | 14,000,000 | Sagas |
| Garlic Jr. Saga | Garlic Jr. | 1,500,000 | The Anime Adventure |
| Spice | 1,000,000 | ||
| Vinegar | 800,000 | ||
| Mustard | 450,000 | ||
| Salt | 400,000 | ||
| Trunks Saga | Goku | 3,200,000 | Kakarot |
| Piccolo | Around 1,000,000 | ||
| Tien Shinhan | Around 70,000 | ||
| Gohan | Between 24,000 to 33,000 | ||
| Yamcha | Between 12,000 to 33,000 | ||
| Krillin | 30,000 | ||
| Chiaotzu | Around 6,000 | ||
| Androids Saga | Goku | 3,900,000 | |
| Vegeta | 4,000,000 | ||
| Future Trunks | Around 4,000,000 | ||
| Piccolo | Around 6,000,000 | ||
| Tien Shinhan | Around 2,000,000 | ||
| Krillin | Around 160,000 | ||
| Android 17 | ??,???,??? (over 14,000,000) |
Sagas | |
| Android 18 | |||
| Perfect Cell Saga | Goku | Around 7,500,000 | Kakarot |
| Gohan | Around 7,000,000 | ||
| Vegeta | Around 6,500,000 | ||
| Future Trunks | Around 6,000,000 | ||
| Semi-Perfect Cell | ??,???,??? | Sagas | |
| Perfect Cell | ???,???,??? | ||
| The Return of Cooler | Meta-Cooler Corps. | 10,000,000,000 | Dragon Ball Xenoverse 2 |
| Broly - The Legendary Super Saiyan | Broly (Legendary Super Saiyan) | 1,400,000,000 | Scouter Battle Taikan Kamehameha |
| Cell Games Saga | Cell (Perfect) | 900,000,000 | |
| Cell Jr. | 46,655,274 | ||
| Babidi Saga | Goku | Around 10,000,000 | Kakarot |
| Gohan | Around 9,000,000 | ||
| Vegeta | |||
| Majin Buu | 1,000,000,000 | Scouter Battle Taikan Kamehameha | |
| Kid Buu | 1,150,000,000 |
Dragon Ball GT
| Saga | Character | Power level | Source |
|---|---|---|---|
| Black Star Dragon Ball Saga | Machine Mutants | 1,500-1,800 | Scouter Battle Taikan Kamehameha |
| Super Sigma | 10,000,000 | ||
| General Rilldo (Meta-Rilldo) | 1,200,000,000 | ||
| Baby Saga | Goku (Super Saiyan 4) | 1,500,000,000 | |
| Baby Vegeta (Super Baby 2) | 1,300,000,000 | ||
| Baby Vegeta (Golden Great Ape) | 1,580,000,000 | ||
| Super 17 Saga | Nappa | 4,800 | |
| Dodoria | 26,399 | ||
| Zarbon | 27,599 | ||
| Frieza (Final Form) | 43,994,141 | ||
| Cell (Perfect form) | 1,079,956,055 | ||
| Super 17 | 1,500,000,000 | ||
| Shadow Dragon Saga | Omega Shenron | 1,900,000,000 |
Gallery
") One of the pamphlets that list power levels ") One of the pamphlets that list power levels ") One of the pamphlets that list power levels ") Power Levels in V-Jump #1 (December 12, 1990) ") Ginyu estimates Goku's power level at around 60,000 .jpg "ArmoredSquadronBP(VJump).jpg (394 KB)") Power levels of Cooler's Armored Squadron (Weekly Jump #25, 1991) .jpg "PowerLevel(Daiz7).jpg (200 KB)") Power Levels stated in Daizenshuu 7 ") Power Levels stated in Daizenshuu 7 ") Broly's and Cooler's power levels in a 2004 V-Jump .jpg "GogetaBP(VJump).jpg (314 KB)") Super Gogeta's power level in a 2004 V-Jump about Budokai 3 .jpg "1Kili50000BP(VJump).jpg (172 KB)") "1 Kili = 50,000 BP" stated in a 2004 V-Jump ") Power Levels in Super Exciting Guide: Story Volume ") Golden Frieza's power level stated at 100 quintillion ") Raditz in Dragon Ball Z: Sagas ") Nappa in Dragon Ball Z: Sagas ") Vegeta's rising power level against Goku in Dragon Ball Z: Sagas ") Nappa in Scouter Battle Taikan Kamehameha ") Vegeta in Scouter Battle Taikan Kamehameha ") Dodoria in Scouter Battle Taikan Kamehameha ") Zarbon in Scouter Battle Taikan Kamehameha .png "FriezaBP(SBRK).png (227 KB)") Frieza in Scouter Battle Taikan Kamehameha .png "CellBP(SBRK).png (278 KB)") Cell in Scouter Battle Taikan Kamehameha .png "LSSBrolyBP(SBRK).png (249 KB)") Broly in Scouter Battle Taikan Kamehameha .png "MajinBuuBP(SBRK).png (230 KB)") Majin Buu in Scouter Battle Taikan Kamehameha .png "KidBuuBP(SBRK).png (233 KB)") Kid Buu in Scouter Battle Taikan Kamehameha .png "RZenBoo(SBTK).png (55 KB)") Good Buu in Scouter Battle Taikan Kamehameha .png "SuperSigmaBP(SBRK).png (280 KB)") Super Sigma in Scouter Battle Taikan Kamehameha .png "MetaRilldoBP(SBRK).png (276 KB)") Meta-Rilldo in Scouter Battle Taikan Kamehameha .png "BabyVegetaBP(SBTK).png (290 KB)") Baby Vegeta in Scouter Battle Taikan Kamehameha .png "GreatApeBabyBP(SBRK).png (252 KB)") Great Ape Baby in Scouter Battle Taikan Kamehameha .png "Super17BP(SBTK).png (231 KB)") Super 17 in Scouter Battle Taikan Kamehameha .png "OmegaShenronBP(SBTK).png (243 KB)") Omega Shenron in Scouter Battle Taikan Kamehameha ") _Battle_Power_in_Scouter_-_DXRD,_ISRAEL.png "Dragon Ball Heroes -GDM- - Bardock's (Masked & Controled by Towa) Battle Power in Scouter - DXRD, ISRAEL.png (1.42 MB)") ") Android 16's power level in Dokkan Battle |